Master class on painting T-shirts with acrylic paints. How to dye a T-shirt: tips, options, results
T-shirt dyeing is a very exciting and creative process. You can almost feel like an artist or designer creating something new.
- How to dye a T-shirt
- Reviews and comments
How to dye a T-shirt
To do this, take:
- white cotton shirt;
- dyes;
- water;
- container for paint;
- gum.
T-shirts are usually made from cotton fabrics, so they can be easily dyed.
Dyes are sold at any hardware store.
you can use natural dyes: instant coffee, birch leaves, blackberries, onion peel, tea, blueberries and others. Over time, they do not lose color and keep the freshness of the T-shirt.
To dye the fabric, grind the plant material, and then boil it in distilled water. After that, boil the solution to the desired concentration, then strain. Soak a T-shirt in the resulting broth. When dyeing things, you can use various techniques for tying fabric to get interesting patterns.
Wring out the shirt and lay it face down on the desired surface. From this side in the middle, take the fabric and twist it clockwise, securing it with elastic bands. The result should be a ball. If you chose artificial dyes, dissolve them with the desired color in water, as written in the instructions. Leave the coloring pigment for an hour. After the time has elapsed, take the item out and lay it on a cloth to dry. Do not take it outside, sunlight will absorb the brightness of the shirt.
T-shirt dyeing at home
To do this, take a thing, dip it into a container, and use a syringe to apply the paint of the desired shades. For convenience, you can apply it first with a syringe, and then evenly distribute it with a brush.
After the drawing is applied on one side, come to coloring the second. At the end of the process, the T-shirt must be thoroughly rinsed in water, dried and ironed to fix the image.
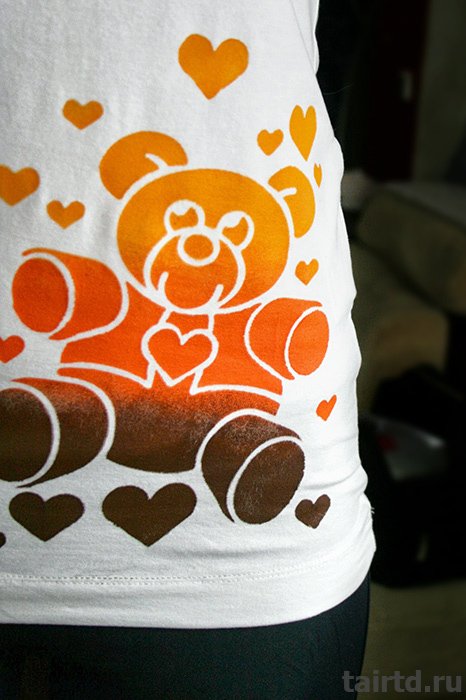
How to paint a T-shirt with acrylic paints
Acrylic colors is the best option for these works, since the substance perfectly penetrates the fabric, has a large color gamut.

They produce samples that glow in the dark, as well as mother-of-pearl and matte paints.
When buying a tone, pay attention to what fabric it is intended for. Choose brushes depending on the complexity of the work. It is better to use synthetic bristles, as they shed less and apply colors better.
So, the materials are selected, you can start the process of painting. Place a layer of paper between the front and back of the garment to secure the fabric.
Thus, the pattern will be worn easier and will not move.
First you need to apply a drawing template with a simple pencil, and then color it.
If during the process of coloring a drop of paint fell in the wrong place, do not worry. It will not work to remove the stain without affecting the main picture. However, you can show your imagination and paint the damaged place so that random drops turn out to be image elements.
Acrylic paints are often difficult to work with due to the thick composition. In this case, dilute the paint with water. Its layer should be uniform and not thick, then the painting holds better. The finished drawing must dry for 24 hours, after which it must be fixed with an iron through gauze at the maximum temperature allowed for the fabric. After that, you can not wash the item for 48 hours.
Tie-dye T-shirt dyeing
"Tai Dai" is a method that allows you to make bright psychedelic patterns on things. This technique has been used in ancient india and China, and in the 20th century it became very popular thanks to the hippie movement. Currently this method used famous brands, such as Stussy, Vans and others.
You can create such a beautiful tie-dye T-shirt at home.
- ordinary paint;
- white t-shirt;
- water;
- plastic containers;
- threads;
- salt.
Paints can be purchased at the hardware store. Salt is necessary for the paint to adhere better. Now you need to tie a shirt.

Twist it in a spiral from the middle so that you end up with lines radiating from the center to the edges. After that, carefully fold the item several times and wrap it with thread.
Now breed in in large numbers warm water paint and add a tablespoon of salt. Apply paint to the item with a syringe or brush. Leave to dry.
When the painting has been done, put the shirt in a dry place. At this time, unfolding the drawings is undesirable, otherwise they will not be fixed. After a day, unfold the thing and enjoy the result.
How to dye a t-shirt dark black
For this you need to take:
- black shade of paint - 1 sachet;
- enamel basin.
First, place a bag of dye in a saucepan, gradually adding water and stirring to form a paste. Then fill the paste with water with a ratio of 0.5 liters of cold water per paint. Mix everything and strain through cheesecloth. Pour the mixture into an enamel basin. Add water at 50 degrees. The amount of the resulting solution should match the weight of the fabric to be dyed within 10:1.
Place the cloth in the prepared solution and put on fire. After 20 minutes, when it starts to boil, add 2 teaspoons table salt. Place the cloth back into the solution and wait for it to boil. This will happen in about 30 minutes. After that, carefully remove it from the heat and put it in safe place. Do not remove the shirt for another 30 minutes. When the time has come, remove the thing and rinse, first in hot, then in cold water. Then gently squeeze out the water and dry.
Coloring the T-shirt in different colors
- regular t-shirt;

- dyes;
- clothespins;
- gum;
- salt;
- bucket;
- rubber gloves.
First you need to wet the T-shirt, then take it with your fingers and twist it clockwise, secure with an elastic band.
If you want to dye a T-shirt with an accordion, you need to fold the item into this shape and secure it with clothespins.
Make a dye solution according to the instructions.
Dip a T-shirt in it for an hour. Remove, untie and rinse in cold water until clear.
T-shirt dyeing process
This is a very interesting and simple method. To do this, pour into the basin warm water. After that, take a few paints that match with each other and start dripping them into the water. There should be a pattern on the surface. Now take a T-shirt and dip it into the water. Leave it there for a couple of hours, then take it out. You will notice that bright and chaotic stains are displayed on the fabric. It remains only to dry it and iron it.
If you have an old white shirt, don't throw it away, give it a bright new life.
Helpful Hints
The T-shirt is the most versatile item in our wardrobe. There are never too many T-shirts. it simple truth even a child learned.
It is best to first try to draw a picture on paper. Lay the sheet side by side, add fabric decoupage glue to the paint that serves as the color for the outline of the pattern and, using a thin brush, lightly outline the outlines on the T-shirt.
If your drawing skills are far from perfect, it is recommended to start with simple organic forms . For example, try drawing a mushroom.

Find in the search engine the best option for the picture. Mushrooms in the drawings look beautiful and are usually asymmetrical.

Apply paint with light strokes. Lines don't have to be perfect and crisp. They can even be a little careless. Such negligence will give a special flavor to the picture.

The advantages of such freehand painting are obvious: you can control the thickness of the applied lines by making them thinner or thicker, darker or lighter.

Play with the brush. The drawing should not look like it came out from under the stencil. T-shirt with a clear sketch visually looks very bright.
Outlining will help you feel the fabric. The texture of the T-shirt varies depending on the weave of the fibers of the materials. Based on these features, each T-shirt will take paint in its own way.

An important tip: if you don't have much design and drawing experience, practice on paper first.
Painting T-shirts with acrylic paints
Step 3:
Add color to your drawing (or leave it uncolored)

To make sure that the dye penetrates the fabric well and the color is applied evenly, stretch the T-shirt slightly. The better the paint is assimilated, the more color fastness it guarantees.
Using the paint undiluted (except that you add decoupage glue to it anyway) will make the color resistant to washing and fading in the later stages of wearing the T-shirt.

However, if you decide to dilute the paint with water, be careful. Too much water can do a disservice to your drawing: the pattern may bleed.
Therefore, if you are in doubt about the thickness of the paint, it is best to test it on paper or another palette before you make a smear on a T-shirt.
Excess water can also be removed with a paper towel or prepared paper towel.
T-shirts with acrylic paints
Step 4:
Application of translucent strokes

If you want soft lines or slightly weaken the color, this can be done without adding a lot of white paint.

Dilute your chosen color (already mixed with decoupage glue) with large quantity water. Press the brush hard on a paper towel to blot excess water.

Before you make a smear on a T-shirt, train your hand. With a light touch, glide the bristles of the brush over the surface of the T-shirt. do it reciprocating movements , as if coloring the desired area to lighten with a piece of chalk.

Drawings on T-shirts with acrylic paints with your own hands
Step 5:
blur background
If you want to make a blue background on a white T-shirt, you can do it without having to fill it with a ton of blue paint. Indeed, from an overabundance of paint, even with decoupage glue, a T-shirt can become hard and as if rubber.
The following method can make a watercolor painting soft, as if you had applied exactly watercolor rather than acrylic paints.
However, be careful, because the paint spreads more on a T-shirt than on watercolor paper. It is really difficult to control the process and the direction of the paint. It will take a lot of patience and attention.
Dilute the chosen color (remember to mix the paint with decoupage glue) with plenty of water. Make sure the previous coats of paint on the T-shirt are dry.

Start with translucent strokes, but before they dry, dip the brush into the water, and with a firm movement of your hand, make strokes on the surface of the T-shirt, applying a little pressure on it.

The water will spread over the surface and wet the acrylic paint. Continue to dip the brush into the water and apply it to the area of the T-shirt that you are interested in in order to create blur background effect .

This will take a lot of time and will require maximum attention and accuracy. However, if you are a creative and enthusiastic person, you will undoubtedly like this activity.
Summer is the best time to forget about boring gray sweaters and dress up in clothes. bright colors. T-shirts with funny inscriptions, torn shorts, funny accessories will look not only appropriate, but perfect. You can try to open your Creative skills, realize the most daring ideas and make an outfit out of an ordinary T-shirt that would surprise even designers. To do this, you can cut stylish holes in it, make a fringe, or you can paint it with paints. We will tell and show how to make a painting of T-shirts with a step-by-step master class.
A painted T-shirt will not only help you easily update your wardrobe for the summer. This is an opportunity to create a truly unique piece that only you and no one else will have. We invite you to try painting T-shirts - a step-by-step master class will allow you to easily do this.
We study the step-by-step painting of T-shirts in a detailed master class
To paint a T-shirt you will need:- plain cotton t-shirt (a synthetic t-shirt will not work, because it stretches and the pattern can be deformed. It is best, of course, to take new thing, but you can practice on unnecessary clothes)
- brushes with natural bristles (synthetic ones can leave stains on the fabric)
- acrylic paints for painting on fabric (for example, you can use sets from Decola and Marabu - they are sold in specialized art stores)
- black marker for painting on fabric
- simple pencil
- clothespins
- stationery paper clips
- board or thick cardboard for stretching the material
- palette or simple plastic plate for mixing paints
1) The T-shirt must be washed and ironed carefully.
2) We place a board or cardboard inside the T-shirt so that our drawing is not printed on the reverse side. Carefully fasten with clothespins and paper clips so that there are no wrinkles, but without stretching the surface of the fabric.
3) Choose any pattern that we plan to put on a T-shirt. Gently apply it to the fabric. with a simple pencil(you can immediately draw on the fabric or use a ready-made stencil). In our example, we will be making a nautical-themed T-shirt with an anchor.

4) We begin to paint over the background with acrylic paints. We paint the strips with blue paint, specifically making them a little sloppy. Leave the white stripes unpainted. Periodically, you need to slightly lift the material of the T-shirt and check that it does not stick to the board.
5) Coloring the anchor in gray, adding shades at your discretion to create volume.

6) We draw a tape at the anchor. It is light yellow in color (a little yellow and brown is added to the white paint). We also add volume using dark shades. We leave the T-shirt to dry the paint - the process can be accelerated with a hair dryer.
7) Now it is necessary to draw the contours of the anchor and tape in black. To do this, you can use a special marker for painting on fabric or a thin brush. You can also use contour paints, they have convenient tubes that allow you to draw thin lines. Most in a simple way there will be, of course, drawing with markers.
8) It is necessary to wait until the paint is completely dry and then iron the pattern with an iron to fix the pattern. Because it is impossible to iron on the image itself, this can be done through a thin cloth or simply from the wrong side. In this case, steam should not be used, because. paint may bleed. Ironing should be approximately 2-3 minutes.
9) A bright and unique summer T-shirt, painted with your own hands, is ready!

An even simpler way is to paint T-shirts using stencils. This does not even require special drawing skills, but only a little inspiration and accuracy.
To paint a t-shirt on a stencil you will need:- cotton t-shirt
- foam rollers;
- acrylic paints for painting on fabric
- stencils (you can choose any pictures and cut them out on a piece of plastic, for example, from a stationery folder)
- board or cardboard for the backing
- clothespins or stationery clips
- masking tape
- paint mixing bowl
1) T-shirt must be washed and ironed.
2) Place a board or cardboard inside the T-shirt and carefully fasten the fabric with clothespins or stationery clips.
3) Choose a place to place the pattern and secure the stencils with masking tape.
4) We mix the paint in a plate and apply it to the foam roller. In no case should you add water to the paint, otherwise it will become liquid and flow under the stencil. If you want to achieve a lighter shade, add white paint. We paint over yellow about a third of the drawing.
5) Thoroughly wash the roller and repeat the same with orange paint, and then with brown as shown in the photo. The colors should overlap each other a little so that there are no sharp boundaries between them.
6) Without waiting for the paint to dry, carefully remove the stencil and leave the T-shirt for about 12-15 hours. After that, iron it with an iron to fix the pattern from the wrong side without steam.
7) The screen-painted T-shirt is ready! Using this technique, you can very quickly decorate boring clothes for children, giving it individuality.
For silk items, you can use more complex techniques, such as batik. These T-shirts can no longer be called simple casual wear, each such thing is, without exaggeration, a designer and unique product.
Video on the topic of the article
For more clarity, we suggest watching the following videos, in which the process of painting T-shirts is demonstrated in stages.
You will need
- - markers
- - acrylic paints and contours
- - T-shirt
- - simple pencil
- - stencils
- - paint for batik
Instruction
Abstraction. Roll the T-shirt into a knot, roll, or rope. Who likes it better. Soak it in paint designed for batik. It can be purchased at stationery or art supply stores. When you straighten the T-shirt, beautiful symmetrical patterns will be visible all over its surface. T-shirt can be tied with a cord or ribbon, while the patterns will be more interesting.
A drawing drawn with outlines or markers. With the help of a contour or a marker, you can draw a clear drawing. For this, there are special markers designed for light and dark fabrics.
Acrylic outlines are small tubes of paint that can be used to draw on fabric. The only thing that contours give way to markers is that you should press evenly on the tube to make the drawing look neater.
Stretch the t-shirt over a flat surface before applying the design. Select a sketch and transfer the design to a T-shirt using a simple pencil. Now you should outline it. If you want to color the drawing, then use acrylic paints.
Stencil. For lovers of pop art, stencils are perfect. Make a sketch on cardboard. The drawing can be anything - it is entirely your imagination. Remember, the drawing should be solid, and not consist of pieces.
Lay the resulting stencil on a T-shirt and paint over the entire sheet, then remove it.
Costume imitation. A very interesting approach to the design of a T-shirt would be a copy of the shirt of a movie or comic book hero. For example, on a dark T-shirt, paint a tie, buttons, and pockets with white paint.
The design is all over the t-shirt. Enough interesting solution there will be a pattern stretching across the entire t-shirt. It doesn't have to be done on one side. For example, you can draw her paws on the back, and the muzzle in front, the tail can be drawn down the hem of the T-shirt.
Sources:
Any plain t-shirt can be a canvas for your experiments. Armed with one jar of paint, you can paint over a T-shirt completely, create abstract patterns on the fabric or apply graphic symbols. To make the most ordinary thing unique, use several fabric painting techniques.
You will need
- - T-shirt;
- - paint on fabric;
- - brush;
- - threads;
- - reserve for batik;
- - cardboard;
- - scissors.
Instruction
If you want to make a colorful canvas without clear boundaries with smooth color transitions, use the free painting technique. Moisten from a spray bottle t-shirt, apply several shades alternately with wide strokes of the brush and let them spread over the surface.
To add a more defined shape to the design and limit the spread of color, try the technique of hot or cold batik. In the first case, those parts of the fabric that should remain light, unpainted, are impregnated with hot wax (using a brush), in the second, fragments of the pattern are outlined with a special reserve that will not let the paint go beyond its borders. Apply the drawing, referring to the sketch and moving from lighter to darker shades.
A painting made in one of the above ways can be supplemented with a three-dimensional contour - it performs only a decorative function and does not replace a reserve.
There are fabric pigments that dissolve in a large amount of water and are originally designed to uniformly color the entire thing. To achieve a more unexpected and interesting effect, make a few “tucks”, tie them with threads, put the T-shirt in a bath or basin and fill it with paint diluted (according to the instructions) on top. Without waiting for the fabric to get wet through, lay it on a dry, clean surface and let it dry (you can dry it with a hair dryer). After that, untie the knots. In these places, the paint also forms voids, which result in an unusual pattern.
Natural fabrics hold paint better, but in recent times many compounds are produced that are also suitable for synthetics - look for information about this on the packaging. It should also say about the method of fixing the paint. As a rule, it is fixed by ironing the pattern from the wrong side.
Sources:
- how to paint a shirt
Each of us strives to be bright and individual, different from others both in manifestations of character, and in such a seemingly completely ordinary life component as clothing. Interesting creative ideas have long been revered in society, you can’t surprise anyone with clothes bought in a store, but if you appear among friends in a non-standard T-shirt with an equally original pattern, most likely, more than one person will overcome you with questions about how to color it yourself t-shirt.

You will need
- - T-shirt;
- - cardboard;
- - acrylic paints;
- - brush;
- - felt-tip pens for fabric;
- - fabric spray
- - a stencil with a drawing blank.
Instruction
Wash the prepared t-shirt. This applies to previously worn items, and recently purchased. In the manufacture, special impregnations are often used, which subsequently prevent you from applying the paint evenly and prevent it from drying without streaks. After the T-shirt has been washed and dried, iron it for comfort in further work. If you chose color t-shirt, then check the effect of paint on the fabric in advance - it may turn out that the accompanying this process chemical reaction will color t-shirt Not exactly the color you planned.
Place cardboard between two layers: back and front. This is necessary so that the paint does not seep to the other side and spoil the future masterpiece. Wrap the top of the cardboard with foil. Your T-shirt should be as if stretched over cardboard - only then will comfort for work be ensured, and the drawing will fall on t-shirt smooth.
Prepare the table for work. Cover it with newspaper or an unnecessary tablecloth. For convenience, you can attach t-shirt with cardboard tape to the table.
Start painting on a T-shirt. If you are not an artist, but more or less well-versed in these skills, apply the drawing yourself by special means: acrylic paints, fabric sprays or. You can buy all this in specialized stores or art salons. If you are not sure of your artistic skill, use a prepared stencil for this purpose. If desired, apply a drawing with a dampened sponge, a handprint or objects. Your imagination can be limitless. Remember that it is very convenient to circle all the drawn elements with felt-tip pens for fabric - the outlines of the picture will become clear, bright and not blurry.
leave painted t-shirt for 24 hours (the pattern on the fabric should dry well) and only then remove the cardboard. If you want to have a design on the back, repeat all the steps, turning t-shirt to the other side.
In the event that a creative streak does not allow you to wear consumer goods and you want to decorate a T-shirt with a print of your own authorship, you can take your time visiting a photo salon. It is much more interesting to paint a T-shirt with acrylic paints yourself.

Instruction
Acrylic for such works is the best option. It penetrates well into the fabric, retains its properties for a long time, has a huge color palette, and besides, it has many effects. There is glow-in-the-dark acrylic, pearlescent paints and paints with a matte effect, using some more materials, you can achieve an interesting effect of cracking the top layer of paint while keeping the bottom, contrasting, intact. When buying acrylic, you need to pay attention to what fabric it is intended for and choose the one that matches the composition of the T-shirt. You will need several brushes depending on the complexity of the drawing. It is best to take brushes with synthetic bristles - they shed less and it is also easier to wash off the paint from them.
After the paints, brushes, drawing and T-shirt are selected, you can start the process of painting. It is better to lay a layer of cardboard or newspapers between the front and back of the T-shirt; it is much easier to fix the fabric on cardboard. It is not necessary to fix the fabric, but it is desirable, since in the process of drawing it will otherwise begin to fidget and the pattern may be displaced. It is most convenient to transfer the drawing with a soft simple pencil, and then color it.
In the event that during the process of coloring a drop fell in the wrong place, do not be upset. Now it is almost impossible to remove this stain without affecting the main drawing, but you can always show your imagination and color the damaged place so that a random drop seems to be an element of the drawing.
Often acrylic paints are too thick, which makes it difficult to work with them. You can even dilute acrylic with water if there is no other way. But this will reduce the quality of the paint and subsequently it will be washed off the T-shirt faster. It is best to use thinner for acrylic paints, it is important that it is of the same brand as the paints. The layer of paint on the fabric must be uniform and not thick, otherwise it may not be fixed. It is always better to do 2-3 thin coats than one thick coat, that's what thinner is for. The better the paint saturates the fabric, the better and more durable the pattern will be. When mixing paints, it is important to do it as quickly as possible, so the colors will be brighter.
1. T-shirt
The T-shirt should be made of natural material, as the fibers of synthetic fabric do not absorb paint well. Usually a white T-shirt is used for art painting, because white does not distort the color of the paint, and on dark fabric, when the paint is absorbed, the drawing is seen worse, and to give it saturated color, sometimes you need to apply paint several times, or pre-paint over with white. Even a new T-shirt must first be washed so that the factory impregnation, which prevents the paint from being absorbed, is removed from it. It can also be ironed for convenience.
2. Drawing

It is advisable to initially know how and what you want to draw. If you do not have the skills of an artist, it will be easiest for you to use a drawing like a children's coloring picture without smooth transitions, in which you just need to paint over each area with the appropriate color. In any case, it will be easier for you to use a drawing with clearly defined outlines, even if you know how to draw.
3. Transferring the pattern to a T-shirt.
In order for the pattern to be in the middle, you need to measure the same distance - from above you can measure from the seams of the sleeve, from below from the edges of the T-shirt.

The design can be transferred to a T-shirt in several ways. In the case of white and light-colored t-shirts, it can be transferred simply under a carbon paper or with a simple pencil, or with a special marker for fabric in the light - by placing a t-shirt with a picture under it, on the glass, under which there is a bright lamp, or by gluing the t-shirt with adhesive tape to the window. In the case of carbon paper, the drawing should be on thick enough paper so as not to pierce it with a pencil. You should not make the line very bold, otherwise it will be difficult to paint over if you plan to use light paint. The drawing itself should also be fixed on the T-shirt with tape so that it does not move while you transfer it.

If the T-shirt is dark, and the pencil or carbon paper mark is not visible on it, and the drawing cannot be seen through the light, then another method can be used. Having attached the drawing, for example, to the window on its reverse side, repeat the outline with chalk. After that, it will be possible to transfer it to a T-shirt, just as in the case of a carbon paper - attach the side circled in chalk to the T-shirt and draw a pencil around the front side. Instead of chalk, you can use a regular metallic gray marker. The fact is that the dye of this marker consists of very fine metallic dust, and it will be printed on a T-shirt just like chalk, but at the same time the pattern can be repeated more accurately than with chalk. Metallic gray should be used, because color can distort the color of the paint, and a regular marker can shed when washed and leave streaks. The drawing should be circled with a marker a couple of times to be sure that it will be beaten off everywhere.

4. Fixing the T-shirt before painting
In principle, the T-shirt can not be attached, but simply laid out on the table, but it is necessary to put some board inside so that the paint does not leak through and end up on the other side of the T-shirt. The plank itself should be smooth enough to make it easier to peel off the T-shirt after drying.

You can fix the T-shirt for convenience by attaching it with push pins to the edges of the board. Personally, I use a thin laminated piece of fiberboard and fix the T-shirt with clothespins. back side of this system, I wrap it in a plastic bag so as not to get it dirty.


5. Paints and brushes

T-shirts are painted with acrylic paints for painting on fabric, which are available in all art supply stores. Before you paint a T-shirt, the paints should be diluted so that they are well absorbed into the fabric. It is advisable to dilute the required amount of paint of the desired colors in separate jars. You must calculate so that this paint is enough to color the drawing to the end, especially if you mix colors, because if the paint runs out, it will be difficult to find the right color. For dilution, you can use water, but it is advisable to purchase a special thinner for acrylic paints in the same store so that the drawing is more resistant. If the thinner is thick and the paint does not come out thin enough, you can add water to it. In no case should you pour water into a full can of paint, as over time the paint may deteriorate because of this. The thickness of the paint is determined by what effect you want to achieve. If the paint is too thick, then you will get the effect of a rubberized fabric that will not bend well, which in turn is not very pleasant. If the paint is liquid like water, it will saturate the fabric well without laying down on it in a layer, but then it will spread beyond the edges of your image, and you will not be able to make thin lines. Therefore, the paint must be made liquid, but not quite like water. And you can combine, for example, by making blurred background liquid paint, and draw thin details with thicker paint.
It is better to use synthetic brushes, as they are stiffer, and better allow you to rub the paint into the fibers, and the pile does not pour from them. But for small details, a squirrel tail can be used because it retains a thin tip well. If the paint has dried on the brush, then you can clean it with a solvent such as a nail remover. It will not be possible to remove paint from a T-shirt without a trace, therefore, in case of a blot, the easiest way is to finish something.
6. Paint application.
First of all, you need to put something under your hand, such as a piece of paper or a napkin, so that your hand does not stick to the drawing.

In the case of a simple coloring picture, first you need to draw the outlines with a special “outline”, which should also be in the store, or just with black paint. After it dries, you can apply the remaining colors, if possible, starting from the middle, so as not to touch the fresh paint.
If the drawing is more complex, then you should always start with light tones, because dark light will not normally be painted over, although small details can be applied with light paint later, giving a little more layer.
Smooth transitions must be done immediately and quickly, as the paint dries quickly. The transition can be made by applying one layer to another, as liquid paint is translucent and somewhat reminiscent of watercolor technique, although in the case of thick paint, it is more like oil.


After the drawing is ready and dried up, the T-shirt can be peeled off from the board. Then you need to let the paint dry for another 2 days, and then you need to fix it, iron it well, back side drawing or through gauze. Moreover, if the T-shirt is simply turned inside out, you need to put something under the picture, otherwise it may leave a mark on the other side.
That's all. As a result of all these actions, you will get an original designer T-shirt with artistic painting.
Tags: master class with a photo, how to decorate, update, colorize, transform, arrange, decorate a simple black t-shirt, how to do it, drawing, inscription, print, patterns on a t-shirt, picture on an old t-shirt, decor, design, decoration, decoration, transformation of a t-shirt , draw, apply drawings with acrylic paints, a site about painting T-shirts, a fashionable T-shirt, new life old t-shirts, original, creative, funny, interesting, designer t-shirts, ideas for t-shirts, paint, decorate, paint, change, decorate a t-shirt, acrylic paints, ideas for drawings on a t-shirt, making a t-shirt with your own hands