Making a concrete pool with your own hands. We organize the construction of a concrete pool with our own hands
A private pool is considered to be a special luxury item and a pipe dream. common man. But is it really that difficult? In this article, we will tell you how to independently create an artificial reservoir - a pool - on the site of a summer house or a country house.
In the classification of structures, concrete pools and reservoirs are on the top lines in terms of complexity and high cost. The construction of these facilities is carried out by serious organizations that have at their disposal a staff of designers and performers. Their services are very expensive as they use the most modern materials and technology. Careful soil studies, laborious load calculations, expensive polymeric and natural materials, multilayer technology - all this makes the final cost of the pool sky-high. Moreover, all points are carefully substantiated.
We will try to destroy the myth about the inaccessibility of a private pool for a homeowner with an average income. The main factor on which we will rely in our actions will be the reliability and availability of reinforced concrete as the main building material. We use the technology used to build monolithic skyscraper frames. By minimizing the number of finishing layers, we save time and money.
Of course, the goal is not to compete with expensive "branded" products in terms of beauty and functionality. However, with the main task - storing water for water procedures - our future pool will cope no worse than elite competitors.
Any body of water radically changes the appearance of the site. It can become a dominant in deciding the appearance of the landscape. We approach this issue from a practical point of view and propose to create a reservoir that can not only be contemplated, but used for its intended purpose - for water procedures.
All pools are divided into indoor and outdoor. As a rule, pools (reservoirs) are arranged indoors with high requirements for water properties and environment and also for year-round operation. In special rooms it is possible to place bulky and expensive filters, heating and air conditioning units, circulation pumps, automatic care systems. Usually these are public pools and dolphinariums.
Pools open type much cheaper and easier, but require regular labor-intensive maintenance. The profession of a pool cleaner (in the West) is considered a hard and thankless job. But everything changes when a person courts his own “brainchild”, built with his own hands.
The "zero point" in the decision-making process will be the conditions under which the device of an open bowl will be impossible or not recommended:
- At harsh winters. average temperature in winter not lower than -20, the minimum is not lower than -25.
- On floating and unstable soils (if the soil is not strengthened).
- Closer than 2.5 meters to capital buildings with a foundation.
- Surrounded by trees shedding abundant foliage and having a developed root system.
Pool at their summer cottage: is it so expensive and how to make it cheaper
In general, the pool is not a cheap pleasure. Its cost can skyrocket, but we will consider the possibility of creating a base - a pool bowl with an emphasis on maximum affordability for the budget of the average Russian.
The first thing we have to do is to decide on the wishes. Dimensions, shape and depth are the main indicators that will form our estimate. Speaking about the choice of the shape of the bowl, we note that rounded sides without straight and even corners (circle, oval, curly) hold the load better, but the complexity of their construction makes you think. Such forms may be beyond the power of a non-professional. Or you will have to generously pay for the services of a specialist. Therefore, we propose to dwell on the option of a rectangular or square shape, as the simplest during construction. bearing capacity we will increase due to the thickness of the walls and thicker reinforcement. Ideal Shape at even angles - a regular square. It is in second place in terms of geometric rigidity after the triangle.
An interesting fact: the word “build” comes from the action “build, build”, that is, give a triangular shape, strengthen the structure.
Since a square-shaped bowl is more like a font, and not a pool, we will take as a standard a rectangular-shaped bowl with a classic 2: 1 aspect ratio (4x2 meters). We will also foresee the bearing blind area in advance.
In this article, we will not complicate the design with niches, steps or a bottom with a variable level. For convenience of calculations, the net depth of the bowl will be taken as 2 meters. Later, you can substitute your own data into the formulas.
 Pool plan: 1 - bowl; 2 - drain; 3 - blind area; 4 - side
What is better to make the bottom and walls of the bunker
There are several answers - brick, cinder block, concrete. The first two would be suitable in the case when it does not need to be filled with water. The pressure of sixteen tons of water must be compensated by walls of special strength. In our conditions, only a reinforced concrete structure, made with strict adherence to technology, can provide such strength. The second reason is the absence of seams, that is, the uniform distribution of the load over the entire surface.
The next step is the breakdown of the construction area
Here it is worth paying attention to the possibility of access to equipment (a small excavator and a concrete pump). When digging a pit, there will be a rather large temporary dump - about 50 m 3.
Important point- after completion of work, about 16 m 3 of soil dump will remain. Consider in advance where it can be identified or taken out. For storage of material and reinforcement work, you will need free space next to the pit (about 40 m 2).
Excavation. The depth of the pit is 2 meters. If there is a possibility of access to equipment, we recommend using the services of an excavator - this will save a lot of time.
The dimensions of the pit will be equal to the dimensions of the bowl in plan plus one meter on each side.
The initial cut will be: V \u003d (a + 2) x (b + 2) x 2 \u003d (2 + 2) x (4 + 2) x 2 \u003d 48 m 3, of which about 28 m backfill 3 .
When the pit is ready and the bottom is cleaned, you need to arrange drainage in case of groundwater. It is the usual channels 30x30 cm, filled with coarse gravel or crushed stone (fraction 40-80). They are laid along future walls and under the bottom of the bowl along the entire length of the pit. Before backfilling with gravel, lay the bottom and walls of the channel with geotextiles. Now you need to make a technical concrete screed, which is colloquially called "footing".
 Pool in section: 1 - drainage; 2 - footing; 3 - expanded polystyrene 100 mm; 4 - polystyrene foam 50 mm; 5 - side of the pit; 6 - primer; 7 - outlet pipe
At this stage, we recommend laying a 50 mm outlet pipe in the center of the future bottom plate (at the intersection of the diagonals). Plastic soil pipe on fittings is easy to assemble and secure before concrete is placed. The inner outlet should rise 30 cm above the level of the bottom of the pit, the outer outlet should go out along the wall from the outside and rise 50 cm above the ground level. In the future, by connecting a conventional pump to this pipe, you will greatly facilitate the care of the pool.
Attention! Select a trap filter for the outlet pipe in advance and lay the foam core in the bottom slab according to its dimensions (before concreting).
After installing the pipe, you can proceed to the device footing. The quality of concrete in this case is not critical, so it is advisable to make it on site. The main task of the footing is to level the surface, prevent the soil from soaking and prevent high-quality structural concrete from mixing with the soil (if it rains during work). It also ensures the accuracy of marking and installation of formwork. Layer thickness 30-50 mm.
After the concrete has set, we lay 100 mm extruded polystyrene foam boards on top.
An important point: the level of the footing should be kept in the horizon - this will greatly simplify the concreting of the slab.
Concrete consumption (volume) is equal to the layer thickness of 0.04 m, multiplied by the footing area of 14 m. In our case: 14x0.04 \u003d 0.56 m 3, we accept 0.6 m 3.
As a bottom slab, a full-fledged reinforced concrete slab with a standard two-layer frame made of knitted reinforcing mesh (A3 16 mm) arranged in a mirror image will be used.
Bottom plate reinforcement
To begin with, we break the plate by size. Be sure to check the geometry (equality of diagonals and sides). Then, in the corners, we drill holes into the footing and drive in the reinforcement, stretch the cords around the perimeter. The length of the reinforcement will be equal to the distance between the cords minus 2 x 40 mm(protective layer). In our case, this is: 2000 - 2 x 40 = 1920 mm and 4000 - 2 x 40 = 3920 mm.
Reinforcing mesh cell accept 100 mm. Such a density of reinforcement is necessary for a margin of safety, because the bottom and walls must be not only structurally strong, but also airtight.
The number of longitudinal rods - 20, transverse - 40 for one mesh layer. In total, there are 40 longitudinal and 80 transverse slabs per frame.
We lay out the rods with a step of 100 mm and tie with a knitting wire. Under the crosshairs of the reinforcement, we lay special plastic limiters 30 mm high with a step of 4x4 cells.
Attention! Do not use welding to connect the mesh rods! This weakens the metal and leads to intense corrosion at the welds.
In order to withstand a constant thickness of the frame, we need reinforcing stops. They are colloquially referred to as "frogs" or "stools". They can be made from rebar with a diameter of 10 mm. With a reinforcement diameter of 10 mm, the net height of the limiter will be equal to the thickness of the slab on concrete minus 2 x 30 mm minus 2 x 10 mm. In our case: 200 - 2 x 30 - 2 x 10 = 120 mm.
Workpiece length: 200 x 2 + 120 x 2 + 100 = 740 mm, accept 750 mm.
The number of “frogs” is 20 pieces, the consumption of reinforcement 10 is 15 m.
 Frog limiter
We fix the “frogs” with a wire in a checkerboard pattern on the lower grid so that transverse rods lie on them in increments of 1 meter. We tie the cross rods to them. Then we lay out all the longitudinal ones on them with a step of 100 mm and tie them with wire. After that, we pass the missing transverse rods between the grids and tie them to the longitudinal ones.
A monolithic structure is one continuous connection of all elements. This effect is achieved by adding a frame (as the main connecting element) to freely released rods. In our case, the slab and walls are concreted separately, so we need to leave free rods fixed in the slab frame for their further weaving into the wall frame.
To do this, bend the reinforcement bars 16 in the shape of the letter P. The distance between the working rods of the release along the axes is equal to the wall thickness minus 2 x 40 mm. In our case: 200 - 2 x 40 = 120 mm. The length of the working part of the rod is 600 mm from the concrete level. Total total length of the workpiece for the U-shaped element: 600 x 2 + 120 + 40 + 2 x 140 = 1040 mm, where 40 mm is the margin for loss of length during bending, 2 x 140 is part of the element inside the plate. We accept the length of the workpiece 1650 mm.
 U-shaped outlet
Calculation of the number of U-shaped elements. The principle of wall reinforcement coincides with the bottom plate, so the step of the outlets will be 100 mm. The number of elements will be equal to the outer perimeter divided by the step. In our case: (2000 + 200 x 2 + 4000 + 200 x 2) x2 / 100 = 13600 / 100 = 136 pcs., we accept 140 pcs.
We pass the U-shaped elements under the first grid of the slab frame and fix it with wire. The reinforcement of the bottom plate is ready, it remains to make the flanging.
The height of the side (the thickness of the slab for concrete + PPR 100 mm) in our case will be 300 mm. As boards, you can use plywood strips sewn onto a 40 mm beam or board (for bending strength). The board is installed along the cords pre-tensioned during the breakdown of the slab and reinforced with slopes. The bottom is fixed by driving the rods. Nails can be stuffed into the upper cut of plywood in increments of 500-700 mm and additionally tied to the frame with wire. The bottom slab is ready for concreting.
Rebar consumption 16: 40 pcs. x 4 m + 80 pcs. x 2 m + 140 pcs. x 1.65 m = 160 + 160 + 230 = 550 m.
Bottom slab concreting
For all structural elements (bottom, walls, blind area), we recommend using prefabricated concrete. It is supplied in automixers and allows you to produce large volumes of concreting at a time. This is important in our case. In order to maintain a constant thickness, make a measurement of 200 mm by welding a transverse limiter to the reinforcement bar.
Be sure to use vibrators when placing concrete. The combination of deep vibration and the use of a vibrating screed will be ideal.
Concrete consumption is equal to the volume of the slab. In our case: 4.4 x 2.4 x 0.2 \u003d 2.11 m 3, we accept 2.3 m 3.
For high-quality reinforcement of the walls, we need to make supporting vertical frames. These are two parallel rods with a length equal to the height of the wall (2000 mm) plus the width of the blind area (800 mm), connected by short rods at a distance according to the outlets. In our case: 2000 + 800 = 2800 mm.
 Welded frame: 1 - A3 Ø16; 2 - A3 Ø10; 3 - spot welding
We install and fix the frames in increments of 1 meter (16 pcs.). We expose them vertically and tie the top with a horizontal rod.
Advice. At this stage, you should determine the level of the walls on concrete - the depth of the pool (2000 mm) minus the thickness of the blind area (150 mm) and apply markers to the frames (duct tape, paint, felt-tip pen).
The level at which the upper horizontal rod must be tied is the level of the top of the wall on concrete minus 40 mm (protective layer).
corners are the most vulnerabilities rectangular structures. They should be strengthened and reinforced, if possible, with solid (whole) rods. At the corners, we will use L-shaped rods with equal sides of such length that they capture two vertical welded frames on each side (diagram). We recommend using L-shaped elements of two sizes - 1200x1200 mm and 1600x1600 mm, alternating them in the design.
 Equilateral G-element
The number of G-elements is the height of the wall (2000 mm) divided by the pitch (100 mm) multiplied by 4 corners. In our case 2000 / 100 x 4 = 80 pcs.
Since it was decided to use two sizes of L-elements, each of them will be 40 pcs. Carefully checking the verticality with a level, set and fix the corners.Then we fill the space with horizontal rods, taking measurements in place.We bring in the missing vertical rods with a length equal to the welded frames and fix them to the horizontal ones.
Attention! The longitudinal overlap of the rods should be 200-400 mm.
Quantity of reinforcement for wall reinforcement
Vertical - perimeter multiplied by 2 layers, divided by a step of 0.1 m and multiplied by a rod length of 2.8 m. In our case: (12 x 2 / 0.1) x 2.8 = 672 m, accept 680 m.
Horizontal (together with G-elements) - wall height 2 m, divided by a step of 0.1 m, multiplied by a perimeter of 12 m and multiplied by 2 layers). In our case: (2 / 0.1 x 12) x 2 = 480 m. Total reinforcement for walls: 680 + 480 = 1160 m.
For concreting the walls in the manufacture of the bowl, we need a lot of formwork (the perimeter multiplied by 2 sides and the height of the wall) - about 60 m 2. It is expensive to manufacture and install such a number of shields on site - the cost of laminated plywood and boards is quite high and will not justify itself. In addition, it is 5-7 working days.
We recommend entrusting this area of work to a company that is professionally engaged in installation and concreting. The cost of renting the inventory formwork and the services of specialists will be lower than the cost of purchasing the material, and the deadlines will be as short as possible. In our case, all the work on the construction of the walls will take 2 days.
After laying the concrete, at least 3 days must pass, then the formwork is removed. Sinks (if any) are sealed with a special repair mixture. We grind the seams and sags with a grinder with a “diamond bowl”.
The consumption of concrete on the walls is equal to the volume of the walls - the perimeter multiplied by the thickness and height. In our case: 12 x 0.2 x 2 = 4.8 m 3, we accept 5 m 3.
After dismantling the formwork, you can proceed to the external heat and waterproofing. Here we will use a material with combined properties - extruded polystyrene foam (PPR sheets) 50 mm thick. Thermal insulation of the pool is needed in order to prevent the heat exchange of water and soil through heat-intensive concrete walls. In other words, to avoid cooling water heated by the sun. In addition, PPR serves as an excellent damper for seasonal soil deformations. Waterproofing is necessary to prevent contact with organic matter and soil.
We will mount PPR sheets in the usual way- stick on mounting foam and fix the dowel "umbrella" after drying.
Question. Why dowel sheets, because they are already firmly pressed with soil.
Answer. The soil tends to be mobile, especially during the off-season (spring, autumn) with frequent freezing and thawing. This can move the sheets and break the tightness of the insulation.
With the help of a hydraulic level, we mark the horizon at the level of the bottom of the future blind area and stretch the cords (if necessary). We strengthen the first row of sheets astride the cord (horizon). We mount the following sheets with a run-up of vertical seams (they should not match). We process the PPR with a bituminous or water-dispersion primer for 2-3 times.
PPR consumption equal to area walls outside. In our case: 4 x 2 x 2 + 2 x 2 x 2 \u003d 24 m 2.
After the waterproofing has completely dried, you can start backfilling the sinuses. Since we will arrange a powerful blind area above the sinuses, we should compact or spill the soil when backfilling in order to avoid its natural settlement later.
We accept the width of the blind area 800 mm. We level the soil around the perimeter of the bowl and make a backfill of crushed stone. We lay geotextile on it. The level of the top of the bedding must match the level of the concrete of the walls. We bend the outlets of the reinforcement, as shown in the diagram. We impose longitudinal reinforcement on the bottom row of outlets in increments of 100 mm. To the top row we fix a welded masonry mesh 3 mm with a cell of 50x50 mm. If necessary, we put limiters - "frogs". The thickness of the blind area for concrete is 150 mm.
On the inside of the bowl, using the “quick installation” dowel, we fix the plywood sheets to the concrete at the level of the top of the blind area. We install the outer flanging in the same way with the bottom plate. We connect the top of the flanging with slats. We concrete the blind area with factory concrete. Optionally, you can also build an additional side along the edge of the blind area.
 Formwork for the blind area
Consumption of reinforcement for the blind area. Width 0.8m divided by a step of 0.1m multiplied by a perimeter of 12m. In our case: 0.8 / 0.1 x 12 = 96 m, take 100 m.
Mesh consumption - the outer perimeter of the blind area, multiplied by its width. In our case: (5.6 + 3.6) x 2 x 0.8 \u003d 14.72 m 2, we accept 15 m 2.
Concrete consumption - outer perimeter 18.4 m multiplied by a width of 0.8 m and a thickness (0.15 m). In our case: 18.4 x 0.8 x 0.15 \u003d 2.2 m 3, we accept 2.5 m 3.
Attention! Concrete gains branded strength in 28 days. During this period, it must be moistened and protected from direct sunlight.
At this stage, the pool is ready for use under water procedures. However, concrete, with all its advantages, has one property that is unacceptable for pools - it accumulates fungus (mold) on itself. Therefore, we have one more mandatory stage - finishing.
There are many finishing materials. The best option seems to us to be a "winter" putty for pools (for example, "Planikrit winter 520" TERTA). The consumption of this putty is 1.2 kg per 1 sq. m with a thickness of 1 mm. We accept an average layer thickness of 3 mm (consumption 3.5 kg per 1 sq. M). The area of the bowl is equal to the inner perimeter times the height. In our case: (2 x 2 + 4 x 2) x 2 = 24 sq. m. In total you will need: 3.5 x 24 = 84 kg putties. Given the packaging in bags of 20 kg, we accept 4 bags.
The advantages of this type of finish:
- one-time application directly onto concrete;
- combination of start and finish layers;
- good sanitary properties;
- subject to local repair (chips, scratches);
- does not require additional alignment;
- does not require high qualification of the master;
- does not exfoliate when the temperature drops;
- the lowest cost among other options.
Disadvantages:
- toxic and combustible (only when applied);
- unassuming appearance.
All actions with putty are described in detail in the instructions.
Consider the approximate cost of a pool located on a site 30 km from Moscow. Prices are indicated in rubles.
Summary table of consumption and cost of materials and services
| Name | Unit rev. | Unit price | Qty | Art | Note |
| Homemade concrete | cube m | 1000 | 0,6 | 600 | For footing |
| Concrete factory BSG M250, V-20 | cube m | 4000 | 10 | 40000 | Bottom plate, walls, blind area. With delivery. |
| Armature with a diameter of 16 mm | linear m | 25 | 1800 | 45000 | Bottom plate, walls, blind area |
| Reinforcement with a diameter of 10 mm | linear m | 15 | 20 | 1500 | Frog limiters, auxiliary rods |
| knitting wire | kg | 100 | 20 | 2000 | Knitting frames |
| Extruded polystyrene foam 100 mm | cube m | 5000 | 1,4 | 7000 | Under the bottom plate |
| Extruded polystyrene foam 50 mm | cube m | 5000 | 1,2 | 6000 | outside the walls |
| primer | kg | 50 | 20 | 1000 | Waterproofing |
| Putty for bowl TERTA "Planikrit winter 520" | bag | 450 | 4 | 1800 | |
| Excavator Services | cube m | 400 | 50 | 20000 | Excluding sinus backfilling |
| Construction of concrete walls | cube m | 2700 | 10 | 27000 | Includes formwork and reinforcement work |
| Services of auxiliary workers, excavators | person/hour | 100 | 40 | 4000 | Cleaning the pit, PRR*, backfilling the sinuses |
| Fare | - | 5000 | - | 5000 | Delivery of fittings, PPR, other materials for 30 km |
| Total cost of material and services | 160300 | ||||
| The cost of 1 cu. m pool | 10000 |
*-PRR - loading and unloading operations
When using the pool, you should pay attention to the following points:
- Clean the bowl and filter as they become dirty with special products.
- For conservation for the winter, it is necessary to make a prefabricated insulated wooden cover with two air vents. Install a fan heater with a relay at +5 ... -10 degrees in the bowl.
- Cover the lid from above for the winter with waterproof material (polyethylene, roofing material).
- Do not use the pool in winter for other purposes (for storing vegetables).
If you follow these simple rules, your pool will last long years. If the pool suddenly gets bored or becomes unclaimed, its bowl can serve as the foundation for any building, even a brick one, in which there will already be a ready-made basement.
Vitaly Dolbinov, rmnt.ru
A private pool is a great gift for the whole family. But if there is no desire to buy a small inflatable version, and the appearance of the frame one does not suit you, then optimal solution- construction concrete pool. Its installation is quite simple, while all work is easily carried out without outside help. But concrete is a rather capricious material until it hardens, therefore, for the reliability of the construction, it is necessary to use certain rules.
So, first you need to figure out what a concrete pool is. It consists of:
- bowls,
- waterproofing layer,
- water supply / drainage systems,
- filtration systems,
- outdoor decoration,
- decorative elements.
The bowl or base is the concrete pour. Its thickness is determined depending on the size of the pool. Approximately calculated by the formula total cubic capacity of the pool (3.1415926*R 2 *Depth)*2/10 = cm. But not less than 10 cm with good reinforcement. The water pressure on the walls of the pool is not too great, but on the other side there is dense soil. As a result, the walls and floor are under a kind of pressure, which will easily destroy a thin fill.
Waterproofing is carried out so that the concrete does not get wet. Although this material is quite tolerant of moisture, in excessive amounts water destroys the structure of concrete, makes it crumbly and causes erosion. In order to avoid premature destruction, high-quality waterproofing is necessary.
A monolithic concrete pool is filled in two ways, either through a hose or using a special water supply system. The first method is quite long, moreover, it does not allow monitoring the quality of water. Using special systems equipped with filters, not only the stiffness is reduced, but also the process of filling the pool is accelerated. Drainage is necessary in order to lower the pool without problems and carry out repairs or cleaning.
If you plan to use additional filters, they must be installed immediately. High-quality filtration stations take up a lot of space, so this moment is thought out in advance.
Exterior finishing includes the installation of tiles and grouting with special waterproof grouts. Any tile is suitable for walls, non-slip options are used for the floor. The use of other materials is possible, but in practice the tile remains the most practical and durable.
The decorative stage is the installation of stairs, handrails, sculptures and other elements that diversify a boring landscape. In addition, decoration extends to the beautification of the area adjacent to the pool.
In order for the concrete pool to be beautiful, comfortable and safe, each of the points is thought out even before construction begins. As a rule, they draw several drawings or graphic models, from which they choose the one they like the most and refine it.
Bowl construction
Mounting the bowl consists of the following steps:
- pit preparation,
- formwork assembly,
- bowl pouring,
- bedding installation.
Before pouring the concrete bowl of the pool, they dig a foundation pit. Its dimensions should be 20 cm deeper and wider than the size of the pool itself. This is necessary in order to make the backfill. In addition, the width of the fill must be added to the dimensions of the pit, otherwise the area of \u200b\u200bthe pool will decrease. Regarding the method of digging, naturally mechanical is preferable, using an excavator. But, if the pool is not planned to be very deep and large, then they manage with an ordinary shovel.
Like any monolithic structures, the walls of the bowl are poured using formwork. The floor of the bowl is poured either on a bed of sand (preferably), or directly on the ground. Backfilling allows you to reduce the pressure from the ground, in addition, it creates a better foundation, which is not afraid of shock and vibration (in case of heavy objects falling into the pool or earthquakes). But the floor is poured only after the walls are made. Therefore, the construction of the formwork precedes the floor. Formwork is done either on the same level with the ground, or a few centimeters lower if it is planned to make overflow bowls. A short formwork installation instruction looks like this:
- we build shields, the height is equal to the height of the walls of the pool, the width is not more than 50 cm,
- we make a crate, for this we hammer in a peg every 50 cm (protrudes 10 cm above ground level) and connect them every 1 m in height using any wooden boards,
- we sew shields to the frame,
- On the other hand, we do the same
- we connect the support pegs with jumpers,
- we put supports under the shields.
Next, pour the walls of the pool from concrete. Formwork is usually removed after a week. The work is carried out at an air temperature not lower than +10 degrees Celsius, otherwise the concrete will become hard for a long time and will not bond well. As soon as the walls are erected, the floor is poured. The bottom of the pool will be ready for further work after 8-10 days.
Tip: it is advisable to use a metal frame both in the walls and in the floor - this will make the structure more durable. To save materials, crushed stone is added to concrete.

After the bowl has completely become and gives up excess moisture, backing is done. Only sand is used. It is advisable to sift it from shells and small stones, but in pools with a volume of up to 10 cubic meters, this is not necessary. Backfilling the walls performs the same functions as backfilling the floor. From above, the bedding is used either for laying tiles, or covered with soil, or turf is laid on top.
Installation of water supply and drainage systems
In order for a concrete pool to be no worse than in specialized complexes, it is necessary to think over the drainage and supply of water very competently. There are two systems:
- permanent,
- cyclical.
The permanent system provides for the constant circulation of water into the systems and is the most perfect, as it can significantly reduce water consumption. On the other hand, its installation will cost many times more. Consists of the following elements:
- feed pump,
- filters,
- storage tank,
- overflows,
- drain channels.
First of all, a storage tank is installed, it must be located below the water level in the pool or consist of communicating vessels (otherwise it is necessary to install an additional pump that will supply water to the storage tank from the waste channel).
Further, we equip the storage tank with all those gadgets that you want to see in your pool (ozonation, ionization installations, other filters and controllers). We connect the supply pump to the tank and draw water into the pool. The supply pipe can go either directly outside, in the form of a decorative fountain or tap (from the head of statues, etc.), or through ordinary holes in the bowl (they are made after pouring the monolith).

Now you need to ensure an uninterrupted supply of water. To do this, either a regular watering hose is connected to the tank, if city water supply is used for filling, or a pump, if the water source is a well (well, other body of water). The full volume of water is driven through the tank filters, then it is filled by another half and the external supply is turned off.
Uninterrupted circulation is ensured by an overflow system. These are special grooves that surround the perimeter of the pool with a continuous ditch. From above they are covered with iron gratings, which act as a primary filter, protecting from large debris, leaves, etc. The grooves must be installed at a slope (but not more than 5 degrees, otherwise the depth of the gutter at the lower point will be quite significant), one of the edges of the pool is taken as the upper point, from which ditches lead to the right and left to the lower point (located strictly perpendicular).
At the lowest point there is a hole leading either to a system of pipes supplying water back to the storage tank, or a small container, the water from which is pumped out by a pump when a certain level is reached. Automation of the process is achieved:
- mechanically
- automatically.
The mechanical method involves manually turning on the filters and the pump in the storage tank when the water level in the pool drops significantly. The automatic method involves the use of special sensors that automatically turn the equipment on and off. Any sales assistant of a specialized store will tell you in more detail about their varieties and properties.
The cyclic system boils down to the fact that water is poured into the pool as needed. Cleaning takes place with the help of chemicals. Naturally, this approach saves a lot a large sum on equipment, but depending on the size of the pool, in 5-10 years the cost of water and chemicals exceeds the cost of filters and pumps. In addition, the lack of circulation will lead to the mandatory appearance of mold. With cyclic water supply systems, mechanical (manual) cleaning of the pool should be performed once a month.
Waterproofing and exterior finish
Waterproofing of concrete pools is carried out:
- chemical impregnations,
- bitumen resins,
- waterproofing films.
Porous films that allow oxygen to pass through but prevent the penetration of moisture were the first to be invented. Although the technology is quite advanced, this option cannot be called good in terms of price and labor costs.

Modern bituminous mixtures, unlike pure resin, are able to pass oxygen, so the concrete will not begin to bloom and collapse. However, resin is not the best base for tiling, so additional plastering work will be required.
Thus, the best of all options would be chemical treatment. It is fast reliable and does not require any additional finishing work. Of the shortcomings - the cost.
Insulation starts with the walls, Special attention at the corners, and only then they process the floor. If crushed stone was used when pouring the bowl, or if the walls and floor were not brought out along the beacons, it is worth plastering them before starting work. Cement is much cheaper than moisture-resistant tile adhesives, so it is cheaper to level the surface in this way.
As soon as the plaster becomes, and the waterproofing work is over, they immediately proceed to the installation of tiles. As a rule, use:
- porcelain stoneware,
- mosaic,
- tiled pools.
Like water, porcelain stoneware refracts light, as a result, such a surface will shine very beautifully in sunny weather. The material is better suited for the floor, as it does not slip. Walls are rarely made, since the cost of porcelain stoneware is quite high.
Mosaic is glass or ceramic. Glass elements look very beautiful, refract light, and create the effect of an inner glow. But their cost can reach 400-500 dollars per 1 sq. m. m. Therefore, stained-glass windows are made from ordinary glazed ceramics. It looks almost the same, but costs 5-8 times cheaper.

The pool tile is supplied with a special covering which excludes sliding. It is made with a special temperature regime which minimizes the destructive effect of water. Most of the pools are finished by combining such tiles and ceramic stained glass windows.
Tip: although most manufacturers of adhesive mixtures say that their products are suitable for any type of work, you should choose special mixtures for gluing tiles in pools (the rest will begin to crumble after 2-4 seasons).
Pool decoration
Do-it-yourself concrete pools will take on a finished look only after performing small but significant finishing touches. Naturally, the first step is to ensure the descent and ascent from the pool. It is not advisable to make a monolithic staircase or build a brick structure (except if the design was invented before the installation work was completed), therefore, metal stairs are used. They are sold ready-made, are easily shortened, do not rust and do not require additional care. In addition, they simultaneously serve as handrails (for monolithic steps, handrails are also needed so as not to slip when leaving the water).
It is not advisable to build pools without infrastructure. The surroundings are usually either a small area with a few sun loungers, or turf with a lawn. A live lawn is not recommended, as it will quickly trample and become unusable. In addition, abundant moisture will encourage vigorous grass growth. Frequent pruning work will pollute the water in the pool with pieces of earth and cut grass.

Another point that children will like is the presence of fountains, hydromassages, etc. Also, the use of special mechanisms allows you to create waves or whirlpools. Devay which is necessary if the air temperature does not warm up above 20-25 degrees Celsius - heating systems. Are established either as a heat-insulated floor, or directly in an accumulative tank.
There are many such gadgets. It is advisable to provide them even before the start of construction, since it is impossible to make fountains or whirlpools without dismantling part of the bowl. But in the case when the budget is limited, all additional elements are installed over time.
Today, more and more homeowners are trying to equip a recreation area with maximum comfort, where the pool occupies a dominant place. A large selection of ready-made structures offered by manufacturers allows for quite short period install a pool of any type. However, if reliability and durability are needed, then you should opt for self-casting of a concrete bowl. Thanks to this technology, it is possible to build a pool of any shape, and even supplement it with equipment and accessories in accordance with personal preferences. The article will discuss how to make a pool of concrete.
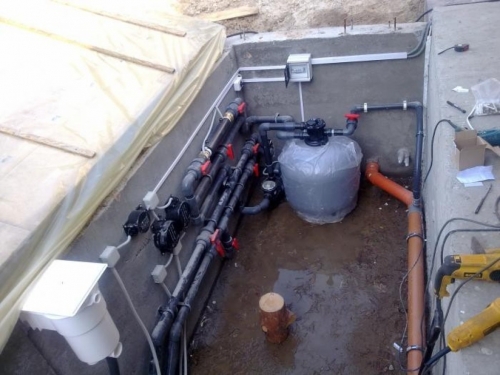
Monolithic pool bowl - all the pros and cons
Concrete pool technology involves high costs. Here it will be necessary to develop a project, rent special equipment for digging a pit and mixing concrete. You will also need a place for a technical room where rigid PVC pipes and additional equipment will be placed.

However, all efforts will be more than rewarded, because such a design has:
- durability. The service life will be at least half a century; no pool made of cutting-edge materials can distinguish itself with such operational characteristics;
- aesthetics. For finishing, you can choose any cladding, including ceramic tiles or porcelain mosaics. Materials are distinguished by an unlimited choice of colors. Yes, and they will last ten times longer than, for example, a film coating;
- originality. The shape of the bowl can be absolutely any, even non-standard configuration. The size of the pool depends on the aesthetic preferences of the owner and the free space on the site;
- functionality. The pool can be made skimmer or overflow. This means that the design will allow you to place all the required equipment (filtering system, auto-topping, heating, circulation pump, etc.);
- comfort. The physical and technical properties of concrete are able to muffle noise and reduce vibrations of operating devices. This is important factor during the operation of the pool.
All the positive aspects of a concrete pool will take place only with the right approach:
- to project development;
- to the choice of finishing materials;
- to the implementation of all technological processes.
Concrete swimming pool construction cost
The approximate cost of the pool can be found only during the design. The final price will be known only after the completion of all works, because during the construction process, any ideas may arise that affect the cost of the project.
In any case, the price level is influenced by the following factors.
Bowl size and shape
- As a rule, a bowl of 2 cubes is enough for relaxing procedures. The most popular pools, containing about 8 cubic meters of water. For swims, you will need a bowl that can hold 30 cubes.
- The recommended depth of the pool for children is 1 meter, for adults - 1.6 m. If you plan to install a jumping tower, then the depth of the thicket should be at least 2.5 m.

- Rectangular concrete bowl with a volume of 30 cubic meters. will cost about 450,000 rubles. The more complex the configuration, the more expensive the construction will cost.
Facing material
Various materials are used to finish the surface of the bowl. Their price per 1 sq. m. will determine the total cost of facing. For example, let's take three options that are in different price segments.
- Budget. Russian ceramic tiles can be purchased for 400-600 rubles/sq.m., which fully corresponds to the expression "cheap and cheerful". This includes the Chinese glass mosaic, its price is 500-700 rubles.
- Middle segment. This category includes polypropylene film (with or without a pattern). Its cost ranges from 1,000 to 1,500 rubles. (Russia). Material with patterns from foreign companies is twice as expensive.
- Premium class. This segment includes cladding made of ceramic products from Italian manufacturers. The cheapest ceramic tile costs 1,500 rubles. per sq.m., but the marginal cost is 70,000 rubles (handmade).

pool type
From what type of pool was preferred (skimmer or overflow), how much money will be required to purchase the appropriate equipment will depend. It is impossible to list all the components of the system, so here are only the main elements necessary for water purification and heating.
- A domestic-made filtration system will cost 7-10 thousand rubles. Imported equipment will cost from 25,000 rubles and more.
- The price of the simplest electric heater ranges from 20,000-40,000 rubles.
- The cost of a chlorine generator, which will make the water crystal clear and safe, is approximately 7,000 rubles.
- Hydromassage equipment will increase costs by 200,000 rubles.
Additional accessories
- Various accessories will help to fill the recreation area with real comfort: a vacuum cleaner, chemicals, a protective film, stairs, handrails and much more. An artificial waterfall for a recreation area will help to emphasize the respectability of the owner (from 40,000 to 500,000 rubles).
- You can hide from the hot sun, and at the same time protect the water surface from the leaves by means of a canopy (awning) or a covered pavilion. The material and complexity of the supporting structure will determine the total cost. According to the most conservative estimates, the canopy will cost 20,000 rubles.

- For internal illumination of the pool bowl, you can purchase LED spotlights with moisture-proof properties. The price of a cheap lighting fixture is 2,200 rubles.
Concrete pool design
The versatility of this technology is amazing. A concrete bowl can be cast not only during the construction of a full-fledged pool, but also for garden ponds, and for children's "paddling pools". The choice of shape and size is limited only by:
- free area;
- terrain;
- landscape design;
- owner's imagination.
In most cases, pools are built in the form of a regular rectangle, popular sizes are 5x10, 6x3 and 8x4 m. A non-standard configuration will require more complex formwork, but this will be justified if the bowl needs to be placed in a limited area.
Do-it-yourself concrete pool construction
Choosing a place for the pool
- The territory intended for construction must exceed the actual dimensions of the bowl. This is due to the fact that for the functionality of the pool it is necessary to lay underground communications, as well as provide a place for installing a technical room.
- Do not place it near buildings. The lack of shade will allow you to use the sun's heat to warm the water. It is not recommended to choose a place next to trees - foliage and dry twigs will quickly clog the water surface.
- When developing a project, it is important to take into account the location of the foundations, including buildings in neighboring areas. Take into account the depth of the passage of underground utilities.
The water exchange system can be of 2 types.
- Skimmer. Such a system is relevant for pools with right angles. Polluted water, under the action of the circulation pump, passes through the skimmer and bottom drain and enters the filtering equipment. After coarse cleaning, heating and disinfection, water returns to the pool bowl through special openings. The waterline is in the middle of the skimmer window. The bottom of the pool is cleaned of debris with a vacuum cleaner.

- Overflow. The water in such a pool reaches its edge. Excess is removed through overflow gutters. Water enters a tank equipped with an automatic top-up device. From the accumulator, water moves to the cleaning and heating system, and then again enters the bowl.
An overflow pool will cost more than a skimmer, but such a system provides more a high degree water purification.
Marking the site for the pit
- The boundaries of the future pool bowl are marked with a strong rope. At the same time, the length, width and depth increase by 1 m. For the current inspection or repair of the pool, it is recommended to make hollow sections in the places where pipes and important nodes pass.
- The wall thickness of the bowl for an average volume of water is 40 cm, for a children's "paddling pool" and small ponds, walls about 30 cm thick are allowed.
- Pit depth Utility room must exceed Lower level pool. For convenient operation, the height of the room is about 170 cm.
- When excavating, a slope of 5-7º of the walls of the pit is observed. This technique will avoid their shedding during ongoing work. It is also necessary to slope the bottom of the bowl towards the drainage system, this parameter should be within 3-4 cm per meter.
- Crushed stone will act as additional drainage. To do this, a small hole breaks out at the bottom of the pit, which is filled with gravel of a large fraction. The workpiece is tightly rammed.

- Next, a sand cushion with a thickness of at least 30 cm is arranged. For reliability, reinforced concrete piles can be laid on top of the sand, they can prevent uneven subsidence of sand under the weight of the finished bowl. The next 10 cm layer is crushed stone 20x40. When backfilling and ramming materials, it is important not to “lose” the bottom slope.
Waterproofing concrete in the pool
- The waterproofing of the bottom of the pit is carried out using a conventional bitumen-based roofing material. Cloths of material should go onto the walls by at least 25-30 cm. The roofing material is overlapped by 10 cm.
- If possible, more modern materials with waterproofing properties can be used. For example: rubberized coating, film or membrane.
- The bottom of the pit is reinforced with lean concrete. For final alignment, beacons are used, which are installed at the desired slope. The concrete solution is evenly distributed by the rule. After the mixture has set, the guides are dismantled.
formwork
- For the construction of a structure for pouring walls with concrete, waterproof plywood with a thickness of 20-40 mm is used. If the shape of the bowl is complex, then edged lumber with a thickness of at least 40 mm is used. All boards are subject to processing, they are covered with paint, drying oil or varnish.

- The bowl is reinforced with steel reinforcement with a diameter of 8 to 14 mm. For rectangular pools, the rods are fastened with knitting wire in the form of a mesh with cells of 20x20 cm. For other cases, metal rods are welded according to the shape of the bowl.
- Armopoyas should cover not only the bottom of the formwork, but also go to the entire height of the double-sided walls. In order for the rods to remain in the thickness of the concrete, clamps and metal supports are used. For the bottom of the pool, you can take pieces of broken bricks.
- All formwork elements are tightly connected with screws, nails, metal corners. Be sure to install internal struts, as well as external supports, and the more often, the better. Due attention should be paid to this stage, because the concrete mixture has a rather impressive mass.
Concrete pool pouring
- The brand of concrete for the pool is selected at least M250. If the batch will be carried out manually, then it is recommended to use cement of a grade of at least 500. The proportion of sand and Portland cement is 2: 1.
- So for 1 cu. solution will need: 260 kg of cement; 440 kg of sand; 800 kg of crushed stone or gravel; 150 liters of water.
- Before starting work, it is necessary to provide for the level of the depth of the bowl (when divided into an adult and children's compartment), technological holes for the passage of pipes, equipment, lighting, etc.

- To achieve a monolithic structure, pouring is performed without interruption. As the formwork is filled, the mixture is “punched” with a shovel or a metal pin. It is mandatory to compact the mass with a vibrator.
- Such equipment will allow you to get rid of the formed air gaps, thereby increasing the strength of the walls. When the level drops, the solution is topped up and re-exposed to the vibration machine.
Internal waterproofing
- After the concrete has hardened, the formwork elements are dismantled. Next, all equipment nodes are connected, the performance of each element and the system as a whole is checked.
- The inside of the bowl should be treated with special solutions. As a rule, before this, the cement surface is cleaned of dust and other contaminants.
- Waterproofing is applied with a brush with synthetic bristles on slightly damp concrete. The second layer is applied after the previous one has dried. The treated surface should not be exposed to sub-zero temperatures and mechanical stress for 3-4 days.
- At the same time, the coating must be periodically moistened by spraying water. Peeling and cracking indicates a violation of the application technology.
- More detailed instructions are indicated by the manufacturers on each package of waterproofing material.

Concrete pool cladding
- Among the finishing materials, ceramic tiles and mosaics are especially popular. A wide range of colors of these materials makes it possible to realize the most daring fantasies. The only requirement for such types of coating is the presence of an anti-slip layer.
- Before applying moisture-resistant tile adhesive, a reinforcing mesh is attached to the surface. The lining starts from the bottom of the bowl. In order for there to be whole tiles in the visible zone, it is necessary to calculate how many elements will fit in a vertical row. In this case, the lower tiles are simply cut to the required dimensions. In the calculations, do not forget to take into account the seams between the tiles.
- Joints are sealed with grout, which must withstand moisture and temperature changes. The color of the grout material is selected to match the tile or you can play on contrasts.
Lighting
To connect lighting fixtures, it is better to invite professional electricians. After all, lighting should be first of all safe, and only then effective.

- The choice of spotlights is simply huge. It is worth noting that special devices have an IP54 index. Typically, cases are made of stainless steel or plastic, for more expensive models bronze is used.
- The lighting elements are halogen lamps and LEDs. The cost of the latter option is undoubtedly higher, but LED lighting is more economical in terms of power consumption, and more durable.
Protective canopies for the pool
- Covered canopies not only protect the water surface from leaves and small debris, but also help to significantly reduce energy costs. Here the principle of arranging a greenhouse is applied. This approach will extend the life of the pool.
- For these purposes, metal-plastic or polycarbonate is perfect. Of course, to budget options these canopies cannot be removed.
- For the winter period, the pool is covered with an awning, ready-made solutions are presented in a huge assortment. A similar design can be made on your own. A metal frame is installed along the perimeter of the bowl, and a polypropylene film is stretched over it.
Concrete pool video
The popularity of swimming pools in the adjacent territories is just beginning to gain momentum. Today, there are many specialized companies ready to carry out a project of any complexity. However, the cost of installation is out of reach for many site owners.
Everyone can build a "primitive" pool on their own, significant difficulties can arise if a complex hydraulic structure is planned. There are big costs ahead: labor, materials, time, but nevertheless, in the future, returns are guaranteed in the form of a wonderful vacation spot for many decades to come.
Comments:
Each owner dreams of being comfortable and convenient on his site, a do-it-yourself concrete pool is the best and affordable solution. To create it, you will need materials that can be purchased at any store, and elementary skills in performing construction work.
In the summer, the pool will be a favorite vacation spot not only for all members of your family, but also for guests. Such a structure will allow you to cool off on hot days, it will serve as a decoration for the site. If you make a pool with your own hands from concrete, you can be even more proud of such a structure.
The main advantage of this design is that it is durable, inexpensive and affordable materials are used in its construction, and all work can be done independently.
But the concrete structure also has a drawback: it will be in certain place, and there is no way to move it around the site. That is why if you decide to make a concrete pool with your own hands, then the process of choosing a place for its construction should be given special attention and everything should be well thought out.
Where to start the construction process?
The whole process of erecting such a structure, like any other construction work, consists of certain stages.
First you need to determine the place where the construction will be carried out.
When choosing a place, it must be borne in mind that such a structure should not be located under trees, otherwise it will be constantly clogged with leaves and branches.

Do not place the pool in the shade, as the water will not warm up well. It must also be taken into account that from time to time you will have to drain and collect water, so the pool should be located closer to the corresponding communications.
After you have decided on the place of the future structure, you need to decide what size and shape it will be. The simplest are round or rectangular pools. Often, the owners make them of complex shapes so that they fit better into the landscape and design of the site. The oval shape of the pool is considered optimal, it fits beautifully into the surrounding landscape and is convenient to use.
In terms of size, a pool of 15-20 m² will suffice. It is not recommended to make a smaller structure, as it will be inconvenient and uncomfortable to be in it.
When you have passed the indicated stages, you can proceed to marking the place for the future design.
Back to index
Creating a pool
The next stage of construction is associated with earthworks. If you have the opportunity and means to attract technology, then this is good. If this is not possible and you want to save money, then you can do everything manually, you just have to work hard.
The pit must be dug to a depth of 2 meters, taking into account that a water level of 1.5 m is considered comfortable, the rest of the height will be used to create waterproofing and a concrete bottom.
When the pit is dug, its bottom is covered with a layer of sand and well rammed. On top of the sand, it is necessary to lay a layer of waterproofing, for this you can use roofing material and mastic, but there may be other materials, the choice of which in the store is quite large.

Now you need to make formwork for the walls, for this boards or other materials are used, plywood is best. Care must be taken that concrete does not flow out of the formwork, for which it can be covered inside with plastic wrap. Now you can pour hydroconcrete, after it hardens, the formwork is removed.
When digging a pit, it must be borne in mind that it must be more sizes of the planned pool, the walls are best done with a slight slope. In order for the pool bowl to be completely ready, it is also necessary to carry out its ironing and pour the floor. In order to make the floor more durable, you can reinforce it. After the walls are made, the floor is poured, for this they use the same hydroconcrete as for creating walls.
In principle, the pool is ready, but for it to work, you must not forget to make a drain system. To give the bowl beautiful view it is necessary to finish it, for which they use a special ceramic tile or film.
Back to index
Features of pool care
To ensure that your pool is constantly in perfect condition it needs to be cleaned periodically. If this is not done, over time the water will become very polluted, it may begin to bloom.
In order to prevent the flowering of water, special compositions are used. If you are not using modern systems, then cleaning should be carried out approximately every 7-10 times. When a skimmer system is used, the pool can only be cleaned once a year.
The peculiarity of the skimmer system is that the cleaning process occurs automatically without your participation. There is no need to constantly change the water. It is also convenient to use an overflow system, but it is rarely used in private pools, since the cost of such a system is quite high.
To protect the pool from falling branches, leaves and other debris, you can create a dome above it. This is not difficult to do, it is performed in the form of a greenhouse. For this, light modern materials are used. This allows not only to protect the water from debris getting into it, but also allows it to warm up better and faster. You can swim in such a pool even in cool weather.
In order to decorate such a structure, its edges must be overlaid with tiles or similar material. If you install special lamps under water, then at night the pool will look like in a fairy tale. You can also make decorative lighting around, so you make the landscape more expressive and attractive not only during the day, but also at night.
Concrete pools are the most reliable. How long your pool will last depends on how well it will be waterproofed. In general, with the correct calculation, the strength of reinforced concrete is sufficient to hold the mass of water and to compensate for the heaving forces of the soil.
Before the widespread use of polymer-cement compositions, in the construction of a concrete pool, a steel caisson was first made, to which reinforcement was then welded. But there were problems. Firstly, it is difficult for steel sheets to give the required rigidity, they are difficult to withstand variable loads from waves formed in the pool. As a result, the tiles often fall off the walls. Secondly, the sheets are welded together, and the welding spots high humidity quickly rust and break down. And thirdly, metal and concrete have different thermal expansions, which contributes to the rapid destruction of walls. But since there was no alternative, they built it just like that.
Examples of mortars and additives that are used in the construction of concrete pools
Today, there are additives that make the concrete walls of the pool impervious to water - they do not absorb or let water through. There are additives that simultaneously improve the adhesion to the rebar and make it more durable. There are solutions for sealing a cold joint, which is formed at the junction of the bottom and walls: the joint is treated with a composition for better adhesion, and a special cord is laid, which expands upon contact with water. Then all this is additionally coated with a waterproof sealant.
There are also water-repellent compounds for plastering, tiling and grouting. All these measures together give the bowl of the concrete pool a high degree of tightness. Making a concrete pool with your own hands using this technology is not particularly problematic. There will be a lot of work, but the costs are less than with caisson technology.
Preparatory stage
First of all, you need to decide on the size and depth of the pool. For adults, a comfortable depth is about 1.5 meters. Swimming is comfortable with a length of at least 5 meters, and how many lanes there will be is your choice (the width of one is 1.5 meters). You also need to decide how the upper edge of the pool will be located relative to the ground - at the same level (fully buried) or higher (partially buried).
In addition to size, decide on the shape. If the construction experience is small, the simpler the form, the better. Mostly they make rectangular or oval pools. But in addition to the main perimeter, it will be necessary to make a pit on one side. This is a small structure, which has a greater depth than the main bowl. There are pipes from the bottom drain or nozzles from the sides. Often there is also the equipment necessary for maintaining the pool (filter, heater, chlorine generator, etc.).

Find out the size and shape, find a place on the site. It is desirable that large trees do not grow nearby, there tall buildings that will cover the sun. Trees are still constantly shedding foliage or color, so they add more work when maintaining the pool.
To place a pool on the site plan, it is desirable to know at what distance the groundwater is located in this place. This is very important information that is necessary to determine the measures for waterproofing the pool bowl. If you already have geodetic studies, then be sure to check with them. The bowl should be placed on the most “dry” area - so that the waters are as deep as possible. If there is no plan, it would be very good to order geodetic surveys. And plan according to their results.
Otherwise, you will have to navigate the terrain. Estimate where the neighbors have wells or wells, at what depth the water is in them. Approximately determine the area with the lowest location groundwater. Plan the pit there. But this is a very risky undertaking.
Excavation
On the ground, apply the dimensions of the pit - it should be 60-80 cm wider and longer. Maybe the dimensions will be larger - you will need to put spacers under the formwork. Dimensions are marked with pegs, twine is pulled between them. The depth of the pit will be 40-50 cm more than planned: a place for backfilling and a bottom slab, plaster, finishing.

You can dig by hand or with the use of machinery. If you can master the work with your own hands - this is for small concrete pools - you can save. If there is no time or energy, it is easier to hire an excavator. In terms of money, he will cost the same as the work of a brigade of "diggers", and in time he will do the job faster.
Filling under the bottom plate
At this stage, a pipe for bottom drainage of water is laid - if such is provided. It is displayed in the pit at a slight angle. If the pool area is large, one drain hole will not be enough. You need two or three. Accordingly, you dig trenches, lay pipes at a slight slope towards the pit.
After these works, the bottom of the pit is leveled and rammed. In this case, a slight slope towards the bottom drains is formed. Then roll out a layer of geotextile along the bottom. It makes the base more durable, prevents the formation of cracks. In addition, it does not allow the soil to mix with the bedding, without interfering with the removal of water. Geotextile strips are laid with an overlap, with a 15-20 cm approach.

Foundation preparation - laying drainage pipes, pipes under the bottom drain, then leveling the base with a slope towards the drain. From above, everything is covered with rubble and sand
Next up is waterproofing. Choose the material of your choice. The cheapest are roofing material or plastic wrap. It is undesirable to use the film, it is torn during work. Roofing material is more reliable, it is rolled out with an overlap of 15 cm. At least two layers must be made, the seams of one must overlap with the other.
Then a layer of gravel is poured - 20 cm, rammed to density with a vibrating plate. Sand is poured on top - a layer of 15 cm. It is shed and rammed. The base for the bottom plate is ready.
Bottom plate reinforcement
A low formwork is placed along the perimeter of the bottom of the future pool. It outlines the contours of the pool. Only the dimensions of the bottom are better to be made 20-40 cm larger. So the base will better resist heaving forces.
Inside the formwork is laid. Use ribbed rods with a diameter of 10 to 14 mm. Ten millimeters are suitable if the soils are not loose and the depth is shallow. The harder the ground and more depth pool, the thicker the reinforcement needed.
For round sections, 10 mm reinforcement is used - it is in bays, and it is easier to make rounded shapes out of it. And in order not to lose strength at the same time, the step between the bars is reduced.
There should be two levels of reinforcement: the first is 5 cm above the bottom edge of the slab, the second is 5 cm below the top edge. The thickness of the slab is usually 20 cm, so the distance between two levels of reinforcement is 10 cm.

The step of laying reinforcement at the bottom is 20 cm. The entire area will be in a cage of 20 * 20 cm. To withstand 5 cm from the edge of the slab, it is necessary to lay the bars on some kind of supports. You can use brick halves, or you can use special coasters.

This is how the reinforcing belt of a concrete pool looks “in profile”
Each intersection is tied with a special knitting wire. Then vertical racks are tied there, which hold the second tier of reinforcement.
Along the edges of the slab, where the walls will subsequently be erected, the reinforcement bars are bent upwards, in the form of the letter “G”. Vertical rods are subsequently tied to them. This ensures the required strength of the connection. They are left hanging, and later used to create a reinforced belt for walls.
Filling the bottom with concrete
After the reinforcing belt is connected, you can start concreting. Concrete is used with additives that give water-repellent properties and improve strength characteristics. The solution can be ordered and delivered to your site by an automixer.
It will be cheaper to do it yourself - in a concrete mixer. But the work will take a lot of time, and you can’t take breaks. The pouring must be continuous so that the edges of the previously laid mortar do not have time to “grab”. You need to work, at least together - one lays out, levels, the second - prepares a new batch.

The outer wall of the formwork can be placed before the start of reinforcement
When laying, it is necessary to avoid the formation of voids - there should be no air in the thickness of the concrete. To do this, use a special vibration unit or an ordinary pole, which is used to pierce the solution, swaying from side to side. Since the bottom must be strong, it is advisable to use a vibrator: you will not achieve the required density with a sixth.
The solution should cover the upper reinforcing belt by at least 5 cm. To make it easier to navigate, set the beacons on vertically raised wall reinforcements or on the formwork.
After the solution is laid out, compacted and leveled, the plate is covered with plastic wrap and left to gain strength. The term of "aging" depends on the additives used and the weather - on temperature and humidity. On average it is 4-10 days.
building walls
All embedded elements are mounted in the walls. These are pipes for water intake and supply nozzles, holes for installing spotlights (if the pool is illuminated), as well as channels for supplying electricity.

The next stage of work is the construction of formwork for the walls. It can be made from edged boards or from moisture-resistant plywood and OSB (thickness not less than 21 mm). The crate will need to be supported - the solution will create a noticeable pressure. To prevent boards or plywood from failing or arching, spacers are made both inside and outside.
Formwork made of sheet material is fastened with metal studs, which prevent the sheets from falling apart. Outside, they are supported by boards set at an angle and fixed with struts. Read about the manufacture of formwork in the article Described the creation for the foundation, but the frame for the walls of the pool is no different, except perhaps in height, and even then not always.
After the formwork is ready and strengthened, a waterproof solution is poured. Everything is exactly the same as when pouring the bottom plate. After the concrete has gained the required strength, the auxiliary frame is removed and the surface is plastered. Your concrete pool is already shaped, and you did it yourself. It remains to put it in order and install the equipment.
Plastering
First, a plaster metal mesh is fixed on the finished concrete wall. They work with a solution with waterproof qualities. You can either buy ready-made mixtures, or add appropriate additives to the standard composition. They are added strictly according to the norm, since excess can only harm.
For plastering the walls of the pool, you can use next composition: cement M-500 (1 part), sand (2 parts), latex additive, microfiber (according to manufacturers' standards). Microfiber will serve as reinforcement and increase the strength of the layer, the latex additive will give elasticity and make the composition water-repellent. As a result, the plaster will not have increased resistance to cracking.
After leveling the walls, you can mount the embedded parts - the nozzles themselves are installed and, until now, plums, backlight spotlights. They are sealed with special cords, then the joints are additionally coated with sealants. To ensure greater tightness, sand or cement is poured onto the applied sealant.

After plastering, mortgages are inserted - nozzles, plums, spotlights, etc.
Waterproofing
Liquid coating waterproofing is applied to the plastered walls of the pool bowl. Moreover, it is desirable - on a fiberglass mesh with a cell of 5 * 5 mm.
If groundwater is located close, the walls must be prepared more seriously before applying liquid waterproofing. The walls are coated with a penetrating primer with water-repellent properties OSMOSEAL. It will not allow groundwater to seep through.
There is also a composition with increased elastic properties - UNOLASTIC. Applied with a layer of 1 mm, it withstands cracks up to 2.5 mm. First, the surface is treated with a penetrating primer, after drying, the elastic composition is applied with a spatula.
Outside, the pool bowl is also covered with liquid or built-up waterproofing. And it is possible - and that, and another.
Before finishing, you can check the quality of waterproofing work. To do this, they draw water into the pool, mark its level on the wall. Leave for 12-14 days. If during this time there is no noticeable decrease in the level, the waterproofing is done with high quality.
Laying tiles is also part of the waterproofing work for a monolithic pool. Glue is used with water-repellent properties, as well as grout for joints. Another finishing option is to use a PVC film welded to the dimensions of your pool.

thermal insulation
Most of the pools require water heating: the mass of water is large, even if there is sun, it is not enough to heat up to a comfortable temperature. For this, special water heaters are used, which are paired with a water treatment system.
But, if you do not make the thermal insulation of the bowl, the cost of electricity for heating will be large, and the efficiency will be low: the heat will go into the ground. Therefore, after waterproofing, a layer of heat insulator is laid. The insulation may be sprayed. Work in this case will take several hours, but you will need to hire specialists.

Slab insulation can be laid independently. Recommended - polystyrene foam. It has excellent performance characteristics, besides it also has water-repellent properties. For summer use, a thickness of 5 cm will be enough. It is only desirable to lay thinner sheets in two layers so that the seams are blocked. Lubricate the seams with water-repellent mastic. The density of polystyrene is not less than 35 kg/m 3 . In this case, it will also partially compensate for the heaving forces.
backfilling
If the soil is not fluffy, in the gap between the pool wall and the bottom of the pit, you can fill up and compact the previously excavated rock. Otherwise, it is better to fall asleep with gravel. It will partially compensate for winter heaving. In general, for the winter in outdoor pools, water is drained only below the level of nozzles and skimmers. Frozen ice partially compensates for the pressure from the ground. And so that the ice does not destroy the walls, plastic eggplants are thrown into the water, which should be about half flooded (you can pour a little sand). When the ice freezes, they take on most of the load. The walls remain intact.

Conclusion
Building a concrete pool with your own hands is an undertaking for a month or two, or even more. It depends on how much time you can devote to the construction site, how many assistants you will have. We have described the "correct" technology. But it guarantees a long life to the pool without cracks and leaks.
One very interesting option concrete stepped pool, which is built in the country with their own hands, see the video.