Homemade Vase: 10 Super-Easy Ideas
Reading time ≈ 11 minutes
Making a vase from improvised materials with your own hands is a great way to pass the time with benefit and pleasure. So you can give a second life to unnecessary things, get an original little thing for the house and transform it. Consider a few simple master classes on making vases from cans, glass bottles and vessels, and other containers available on the farm.
Examples of vases with their own hands.
Decor materials
The DIY vase-making tutorials below will use materials that you are likely to find in your home, and only a small part of them you may need to purchase. Of course, we are talking about decorating a finished waterproof vessel, since it will be an overwhelming task for most to make a vase from scratch on their own.
You may also be interested in:
Many materials can be used to decorate a vase:
- textiles of all kinds, textures, colors, including ribbons, yarn, ropes, burlap;
- buttons, beads, beads, sequins;
- colored (printed) adhesive tape;
- enameling, glitter;
- coffee beans, cereals, seeds, coarse salt;
- natural plant materials: twigs, chestnuts, acorns, leaves;
- sea shells, natural stones;
- kraft paper, cardboard;
- clothespins;
- coins.

Materials for needlework.
For fastening, it is best to use a transparent glue, which, when dried, does not give a shade and does not stain the materials. And as a basis, a great variety of containers that do not let water through are suitable:
If you are not going to put fresh cut flowers in water in a vase, then the product can be made of a permeable material (cardboard base, for example, a coil or reel).
Cardboard bobbins.
Vase from a jar and twigs
To create a vase, you will need materials that you can probably find at home:
- glass jar with a volume of 0.5, 1 or 1.5 l;
- twine or thin rope;
- a small piece of burlap;
- chopped twigs of small diameter (about 0.5 cm);
- glue.
Tip: the glass jar can be replaced with any other cylindrical container.
Step-by-step production of a vase from twigs.
Step by step production:
- Cut the collected branches with a hacksaw into segments of the same length. They should be similar to the height of the glass container.
- Using twine, fasten the branches at the upper and lower ends, tying the twine into knots. As a result, you should get a kind of canvas of twigs.
- A piece of burlap, equal in length to the circumference of the jar, must be wound on the vessel, the upper ends wrapped inside the jar and glued. A neat bottom can be left free.
- Next, the canvas of twigs needs to be wrapped around the container and tied into knots.
Alternatively, you can not use burlap, but plant branches on glue directly on the jar. In conclusion, it is desirable to fasten the structure with a rope wrapped around the can in several turns. The product will look as decorative and aesthetically pleasing as in the burlap version.

Ready product.
If you use not thin branches, but thicker segments, the vase will turn out to be more rough, but no less original:
Another version of the product.
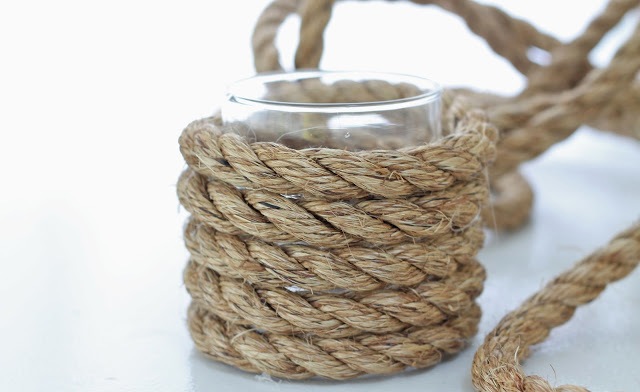
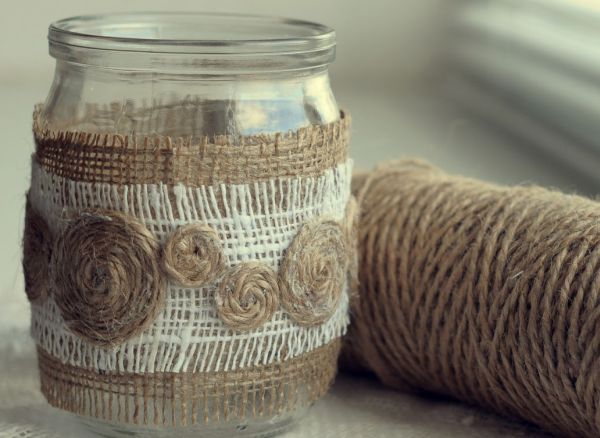
When using jute
In this master class, you also need to use a glass jar or bottle. You will also need:
- glue;
- twine, jute or other beautiful rope, a thick rope will also work.
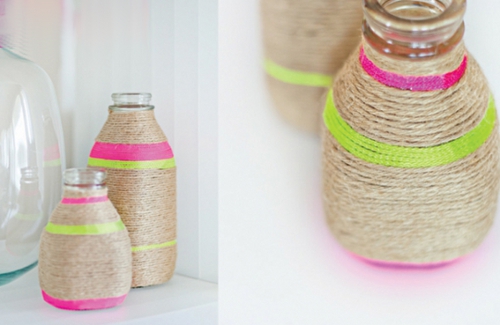
Twine decor.
Manufacturing step by step:
As a result of the work done, you get such a laconic and spectacular vase with your own hands from improvised means:
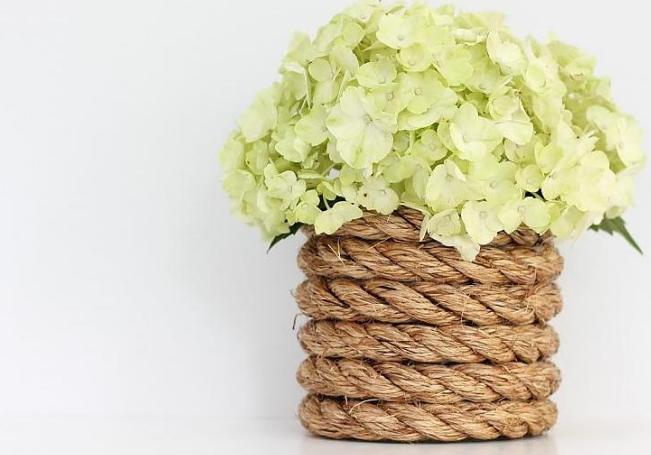
Ready product.
With a fairly impressive size of the vessel, the vase can be used as a floor vase.
Painted bottle vase
This master class is also very simple and will take you no more than half an hour. Necessary materials:
- a glass bottle for any liquid (mineral water, champagne, dairy products);
- universal spray paint of the desired color.
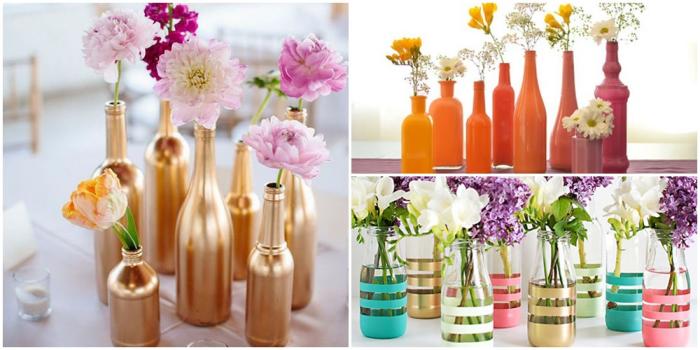
Painted bottles.
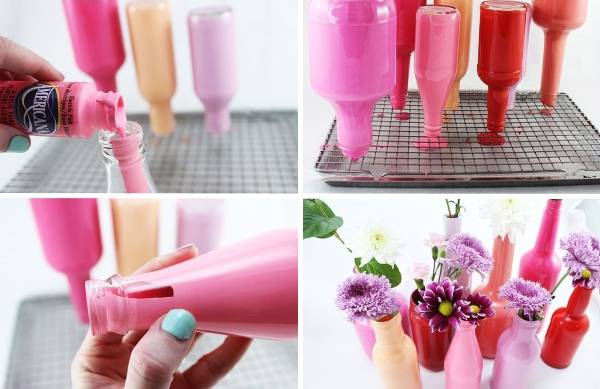
Step by step process:
- Wash the bottle inside and out, remove all labels and traces of glue.
- Put the bottle on a metal or wooden rod, turn it over - this will be a kind of support.
- Now the container can be painted. It is advisable to use the paint in a spray can for an even and uniform layer without smears.
To get a geometric or any other pattern, pre-cut strips (other shapes) from adhesive tape and stick on the container before painting.
For a more festive and elegant look, you can use sequins of an adjacent shade. With the help of paints and sparkles, you can create very spectacular ensembles.
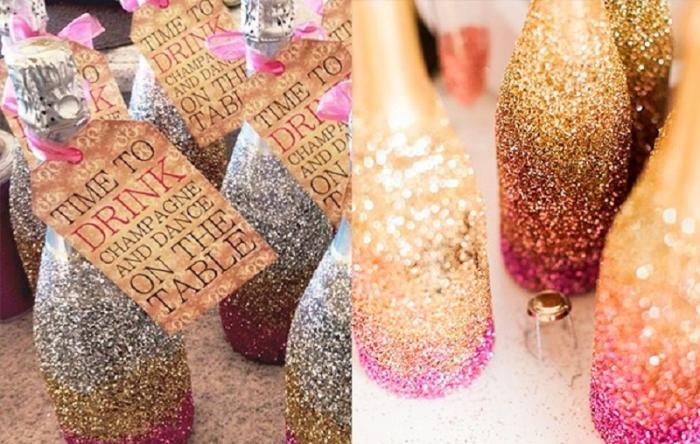
Glitter decor.
Sequins can cover not the entire vessel, but only part of it:
Partial decor.
There is another option for coloring the bottle - from the inside. To do this, you can use paint in cans. You will also need a metal baking sheet and a grid. Bottles need to be prepared, then pour a small amount of paint inside and carefully distribute it over all walls, turning the bottle over. To dry, the vessel must be turned upside down and left for a day.
Coloring of bottles inside.
Vase of clothespins and tins
The next vase is suitable for a miniature bouquet of delicate flowers. For the manufacture you will need a tin can, a set of clothespins.
Tip: to make the vase neat, it is important to use a small jar, the walls of which can be completely hidden under clothespins.
- Clean the jar of dirt, remove the label.
- Attach the clothespins tightly to the sides of the jar. For reliability, you can use glue. We recommend purchasing a set of plain wooden clothespins for making a vase - they look as aesthetically pleasing as possible.
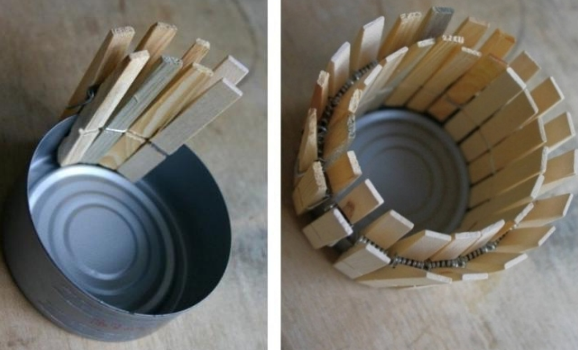
Manufacturing process.
The finished vase can be decorated with clippings or stickers. In fact, this is not quite a vase, but rather -. Inside such a stand, you can place a glass cup with a bouquet.
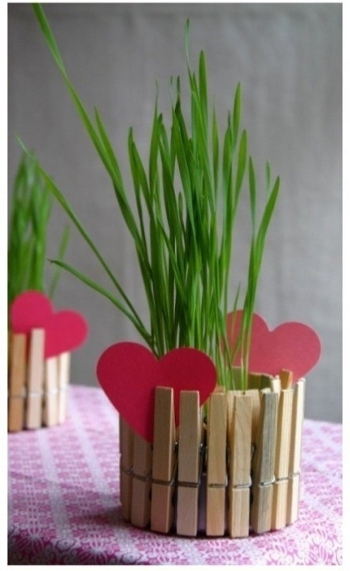
Finished vase.
Vase for artists
You can make the following creative vase in 20 minutes, the main thing is to have all the necessary materials on hand:
- any cylindrical container that does not allow water to pass through;
- strong glue;
- packaging of pencils / felt-tip pens / brushes.
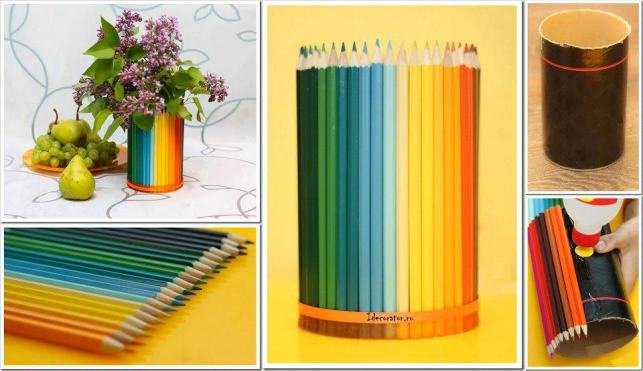
Decor and pencils.
The photo shows that for the manufacture of a vase, the container must be carefully and tightly pasted over with pencils. For a beautiful look, it is advisable to use a pack of new pencils of the same length. The finished product can be tied with a decorative ribbon.
If you use brushes, the vase will look like this:
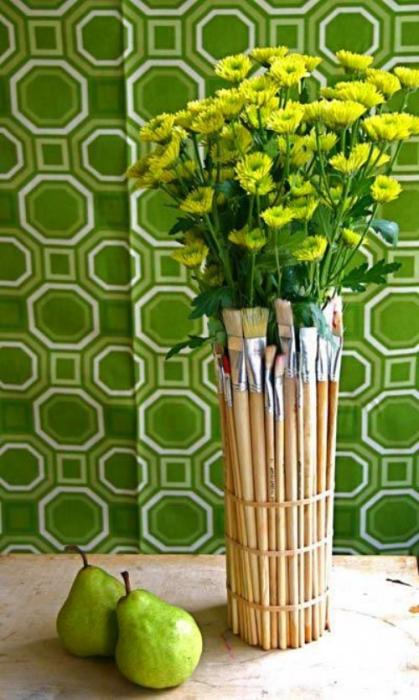
Tassel decor.
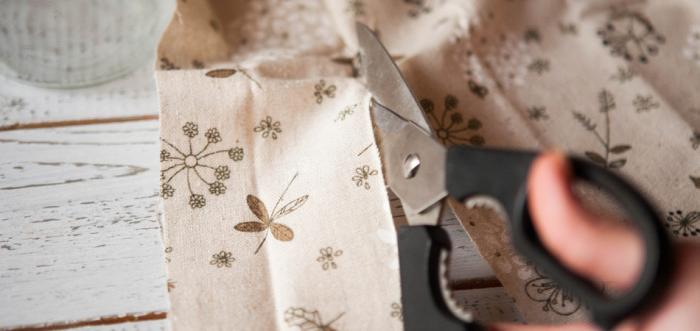
Using fabric
To create the next vase, we will use a simple set of materials and tools:
- a glass container (glass is better, as it looks beautifully from under the areas not covered with fabric);
- a small piece of fabric (several harmoniously combined colors can be used, plain canvases can be supplemented with printed ones);
- glue;
- scissors;
- for decor: twine, buttons, beads, ribbons, lace, etc.
Idea: Instead of buying new fabric, it's better to look for unnecessary pieces among your needlework materials, as well as sort out old, not worn items for a long time. Natural materials will look most cute and gentle: linen, cotton, natural lace.
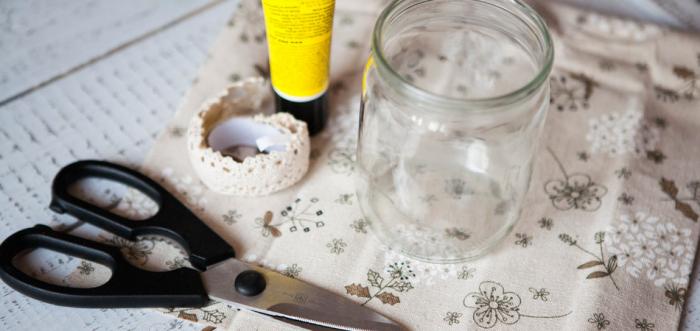
Necessary materials.
Step by step manufacturing process:
The following photo shows another version of this technique:
burlap decor.
knitted texture
For the next super-simple workshop, you will need an unnecessary knitted item or yarn and knitting needles (if you have knitting skills), as well as a vessel. The bottom line is to make a kind of cover for the container. To do this, you can cut off a sleeve from an unnecessary knitted item if it fits the vessel in diameter. One edge must be carefully tucked up and put on the container - voila, the decor is ready! If you know how to knit, then the original cover can be made in the evening. To avoid seams, it is better to knit on four knitting needles.
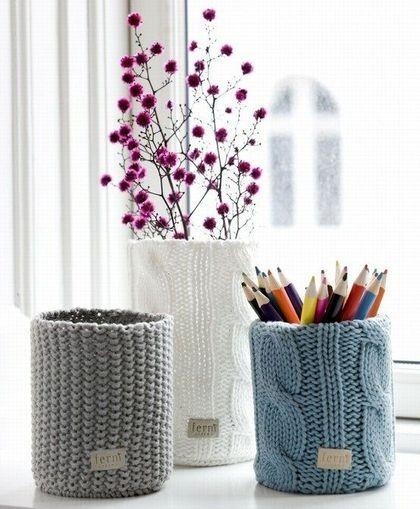
Knitted cover for a vase.
By the way, according to the same principle, covers are made for stationery stands, candlesticks, cups and thermoses, and even furniture.
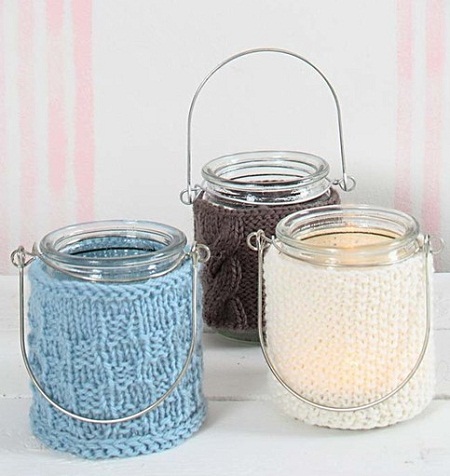
Case variations.
Light bulb mini vase
The following incandescent bulb vase is small in size, so it is suitable for placing a small bouquet or a single color. However, if you make an ensemble of several "vases", you get a very effective picture.
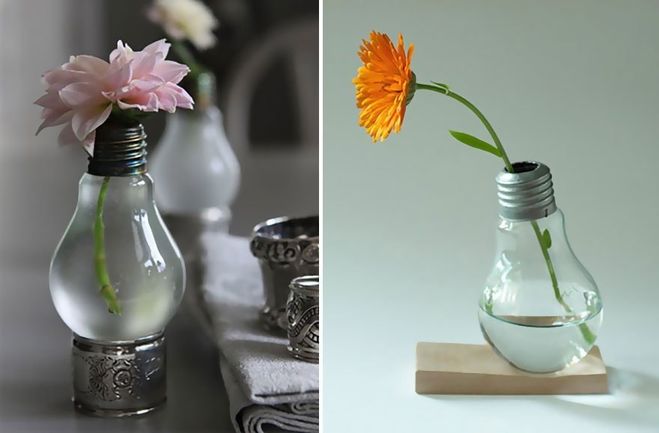
Light bulb vase.
For manufacturing, prepare the following materials and tools:
- a few burned out or new light bulbs;
- twine or thin braid;
- pliers;
Step by step production:
- Use a sharp knife to pry off the soldered part (insulation).
- Next, you need to remove all the “stuffing” from the light bulb: the stem, electrodes, thread. It is important not to damage the base.
- Next, you need to wind the twine around the base and make a small loop - our vase cannot stand, so it will have to be hung.
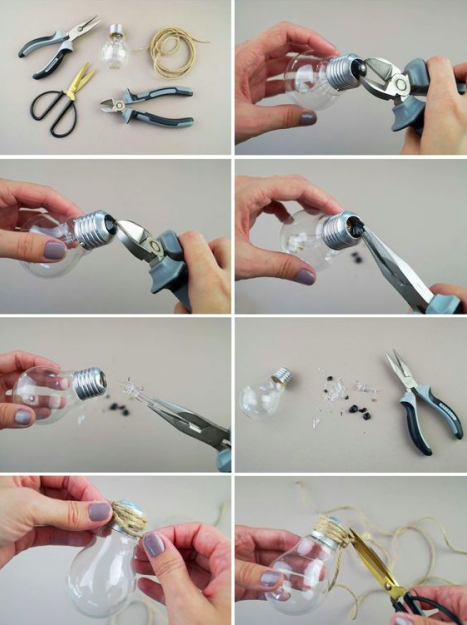
Manufacturing process.
This product is ready! It remains to do the manipulations with the remaining light bulbs, and make a kit.
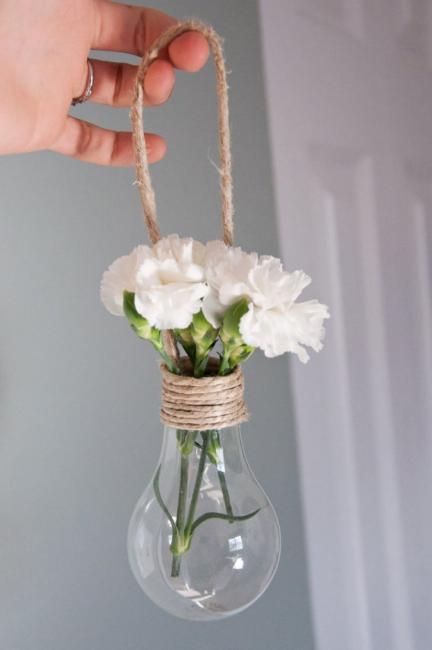
Ready product.
An ensemble located on a tree of branches will look very original:
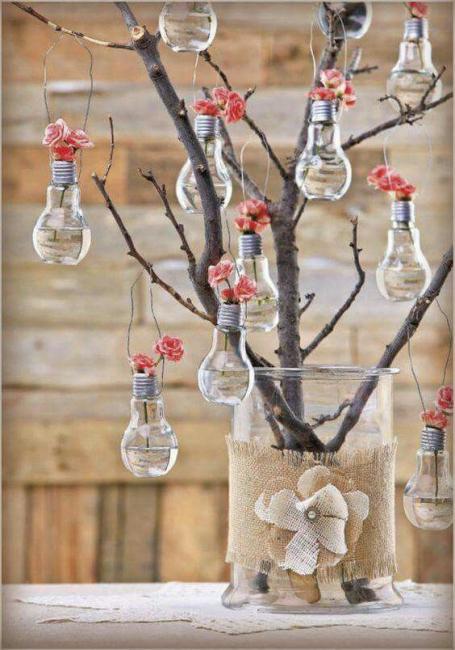
Ensemble of vases made of light bulbs.
Ensemble
Such a composition looks very festive, elegant, gentle and at the same time, it will take quite a bit of time to create it. The main thing is to choose containers that are identical in size and design. It is undesirable to fasten them with glue - so, if necessary, you can disassemble the ensemble. A much more practical and elegant option would be a beautiful satin or rep ribbon in several turns, tied into a bow. With a narrow neck of containers, only one flower can be inserted into each.
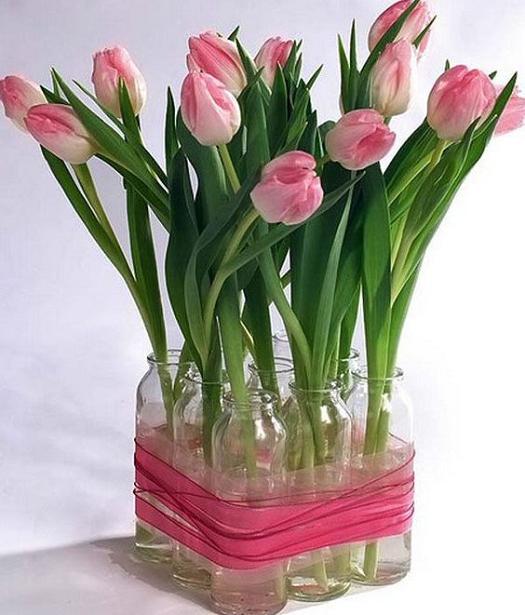
An ensemble of containers.
Putty decor
In conclusion, we will tell you how to decorate the vessel with putty and paint. If you have some putty left after the repair, this option is just for you!
What you need:
- glass vessel of any shape and size;
- putty;
- acrylic paints and varnish (paints should be in contrasting shades);
- floristic mesh;
- sponge, fine-grained sandpaper and a small spatula.
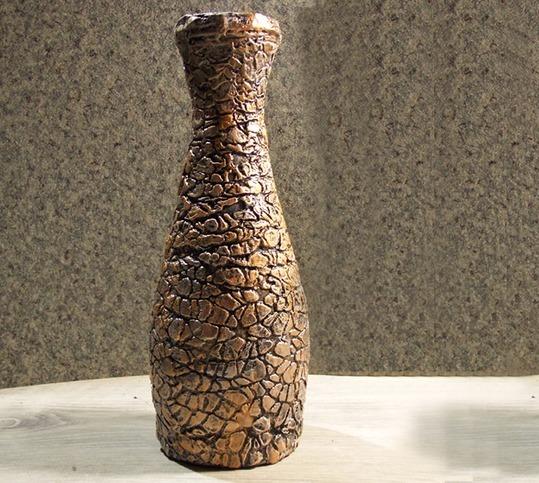
Putty decor.
Step by step production:
Video: do-it-yourself putty vase.