Do-it-yourself piggy bank from a tin can with locks
An unusual and stylish piggy bank can be made with your own hands from an ordinary tin can with a lid for storing bulk products. For this, special knowledge or skills are completely unnecessary, the main thing is that the hands are at least a little skillful. We will decorate the tin can with strips of paper towels, creating a relief of a randomly laid fabric, followed by staining with acrylic paints, embellishment with mother-of-pearl semi-beads, decorative chains and small golden locks.
To make a piggy bank from a tin can, we need:
- tin can of any size and shape
- paper towel roll
- PVA glue about 200 gr.
- Acrylic paints black matte
- acrylic paint gold
- semi beads
- decorative chain
- small locks
- coins of various denominations
- glue Titanium
- hard and soft wide brushes
- black beads (a little)
 First you need to cut strips of paper towels about 4-5 cm wide. Dilute PVA glue with water 1: 1 in a container with a wide neck. It is more convenient to “work” with a rectangular or square tin, in the process you will understand “why”.
How to make a piggy bank with your own hands from a tin can
 Prepared paper towel strips
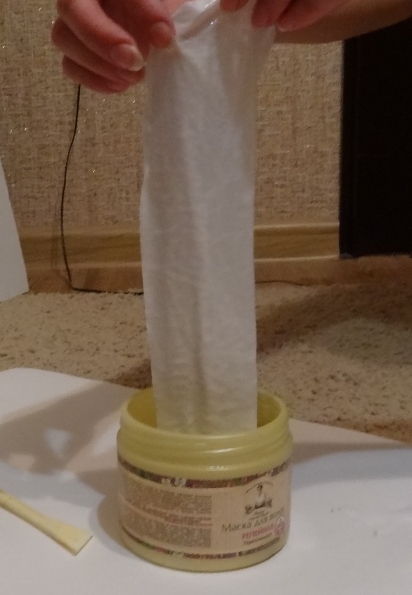
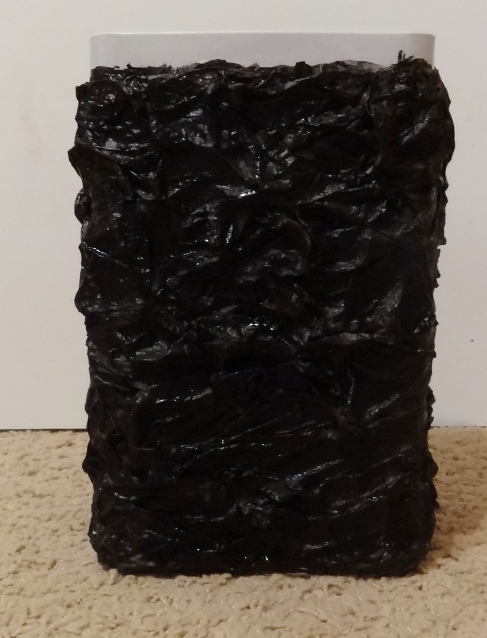
  we lower the queues into diluted glue. When taking out the workpiece, it is necessary to squeeze it slightly, passing between two fingers. Be careful not to apply pressure to avoid tearing the paper. The strip should only be saturated with the adhesive mass, but not soften in it. The resulting strip must be carefully placed diagonally on the tin, creating arbitrary folds, like on a fabric. Thus, it is necessary to lay the strips on one side of the can
  and leave the craft until the glue dries. The opposite side is covered in a similar way. In total, two or three layers of paper towels are needed to make the piggy bank look solid and stylish.
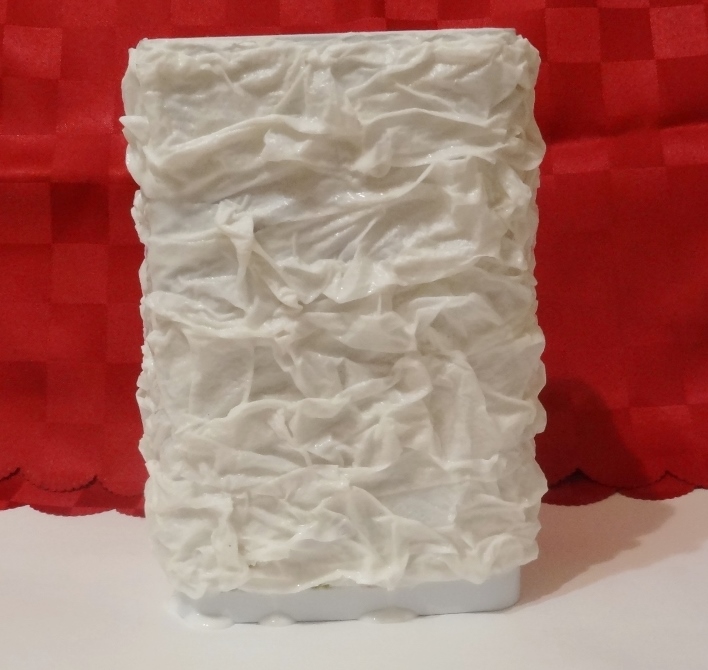
This is how the workpiece should turn out:
A completely dried blank can be decorated. First you need to paint it in the base color, for which we take matte black.
Before painting, acrylic paint must be diluted with water in the proportion of 1 part paint: 2 parts water. It is recommended to use a wide soft brush. During staining, try not to miss the folds and fill every millimeter of the future piggy bank with paint.
The paint should now dry completely. This will take about 5 hours. In the meantime, you can do decorating the lid of the piggy bank.
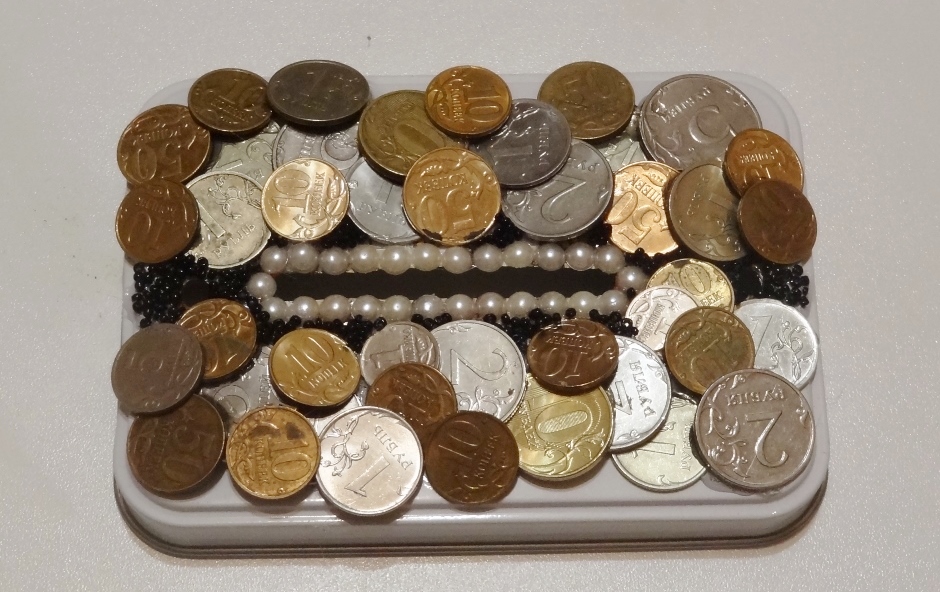
Decor of the lid of the piggy bank with coins, semi-beads and beads
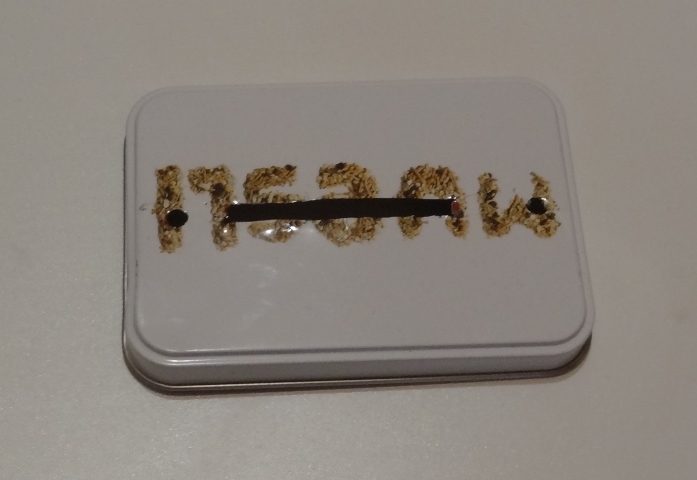
First of all, it is necessary to make a bill and a coin receiver from the cover. To do this, simply cut a rectangular hole with a knife. To equip the piggy bank with locks, we cut out a round hole on the sides of the lid and on the piggy bank itself.
Now glue the coins with titanium glue. We apply glue to the coins and place them on the surface of the lid in a random order, in the style of a slight mess. We decorate the hole for the money with beads, gluing it similarly to coins. We fill the gaps between the coins with black beads.
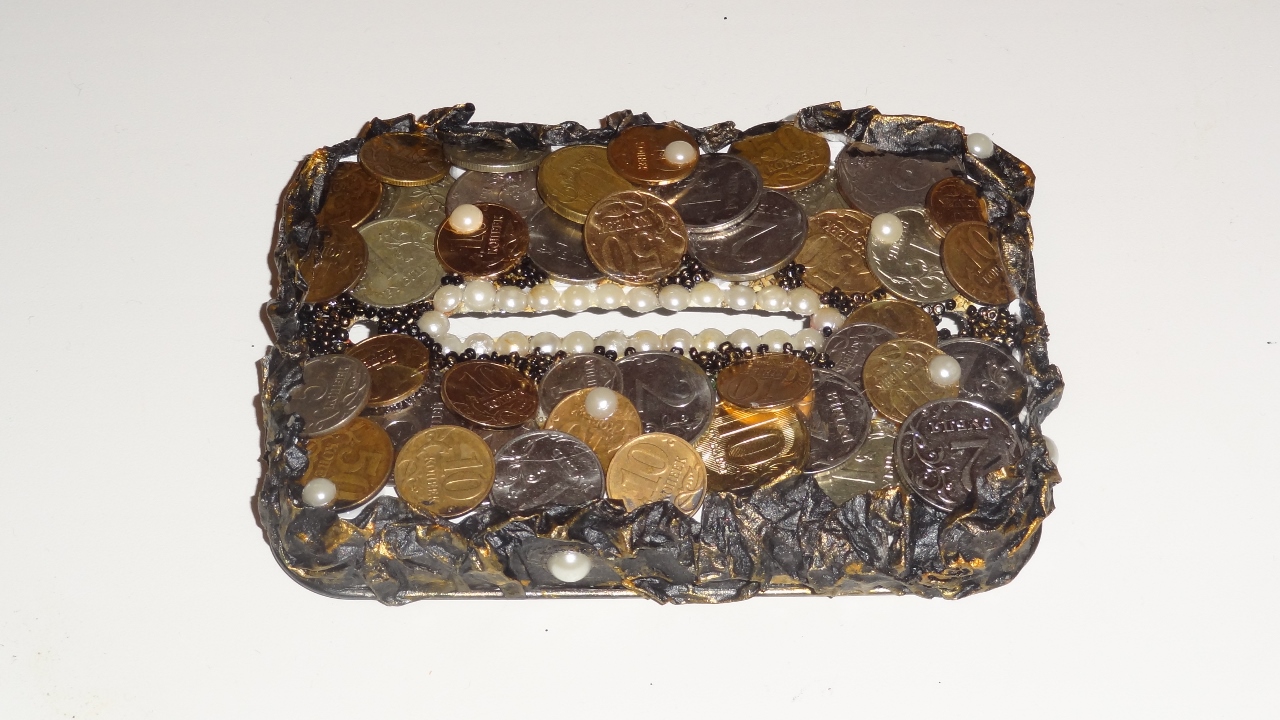
The penultimate stage of making a do-it-yourself piggy bank from a tin is applying gold acrylic paint. To do this, you need a hard wide brush.
Gold paint does not need to be diluted!
Gold decor is applied to the surface of the folds of the piggy bank trim with light brush strokes, slightly touched with paint. Drying, the gold decor on a black background creates the effect of old pure gold, shines beautifully in artificial light, looks expensive!