How to make a vase with your own hands
How wonderful it is to receive a bouquet of flowers as a gift or just pick them in the field and bring them home to fill the atmosphere with a fabulous aroma! Be that as it may, you will definitely need a vase.
Decorating your home is common to all women. They lovingly equip life, decorating a cozy house with cute trinkets, including various figurines and vases. Of course, it is easier to buy ready-made products, but if you want an exclusive and unusual presentation, read our article. In it we will tell you how to make a vase with your own hands.
How to make a paper vase with your own hands
You can completely make a paper vase at home using papier-mâché or origami techniques. But for this you need to have certain skills, and this is not suitable for everyone. And be sure to keep in mind that only decorative flowers can be placed in a vase made of cardboard or paper, because the product will become unusable from water.
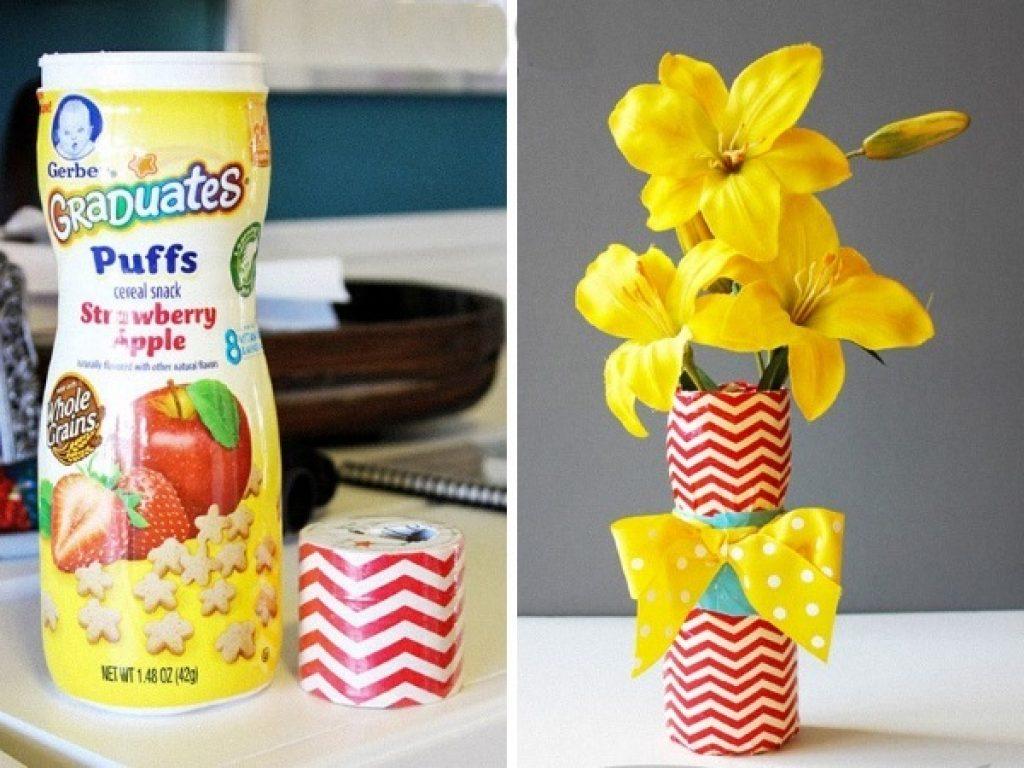
To make a paper vase, you can use any transparent container such as an old can or a used bottle. To give them a beautiful look, glue the surface with corrugated paper of the selected color or wrap it with colored cardboard and decorate with matching ribbons.
DIY paper vase: video
Tip: in order for the paper to stick well to the glass, use PVA glue diluted with water in a 1: 1 ratio.

How to make a do-it-yourself cardboard vase
For work we stock up:
- cardboard;
- scissors;
- glue;
- paperclips;
- tape;
- coffee beans, nutshells, pistachios (for decoration).
We take any large box, lay it out on the floor or on the table and draw a diagram on it (Fig. 1). Then we cut out the shape and fold the vase out of cardboard, fixing the corners with tape. Carefully glue each fold so that the vase does not fall apart. If necessary, glue the outside of the product with paper, wrapping it inward and fixing it with paper clips.
It's time for decor. Of course, it is difficult to calculate how many decorative elements you will need to decorate a homemade vase, but in the process of work you will figure it out and, if necessary, buy the missing amount of details. So, smear each piece with glue and, starting from the bottom of the vase, begin to glue it carefully. At the same time, try to keep as little empty space as possible between the elements. The result should be a vase, as shown in the picture.
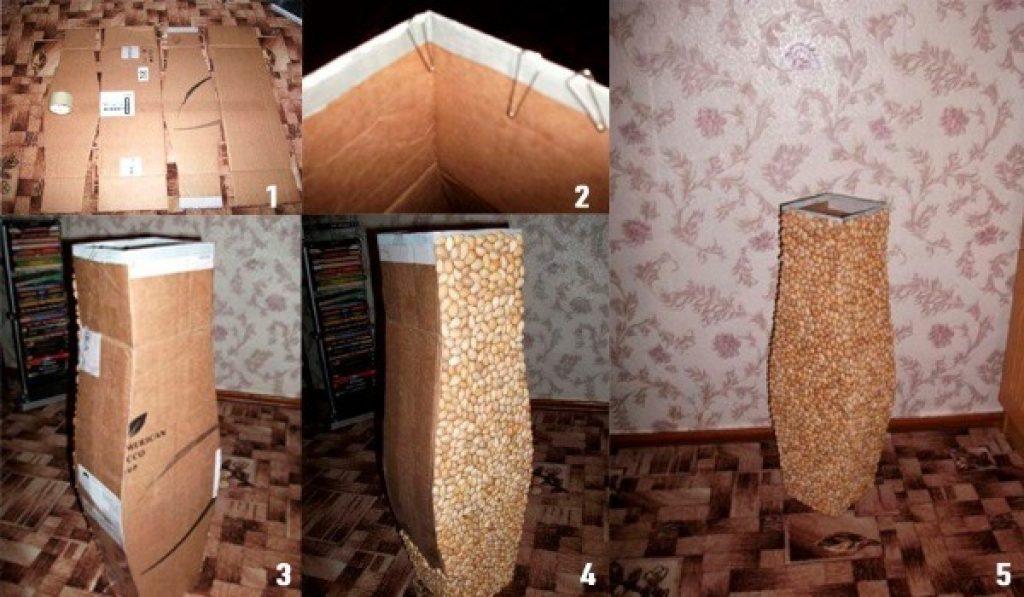
Do not forget to process the upper part of the product in a similar way from the inside. Everything, the vase is ready to decorate your home!
Do-it-yourself cardboard vase: video
To make a vase with your own hands, you will need: 1. Corrugated cardboard; 2. Mass of papier-mâché; 3. Masking tape; 4. Hot glue; 5. Acrylic paints and varnish.
If you have a few hours of free time and a desire to create something beautiful with your own hands, read how to make a simple origami paper vase with your own hands.
In fact, apart from double-sided colored paper and following the instructions exactly, nothing is needed! In addition, origami is a great way to develop fine motor skills, imagination and logic.
A simple paper vase is useful for storing office supplies, and you can also put a vessel with water and flowers in it.
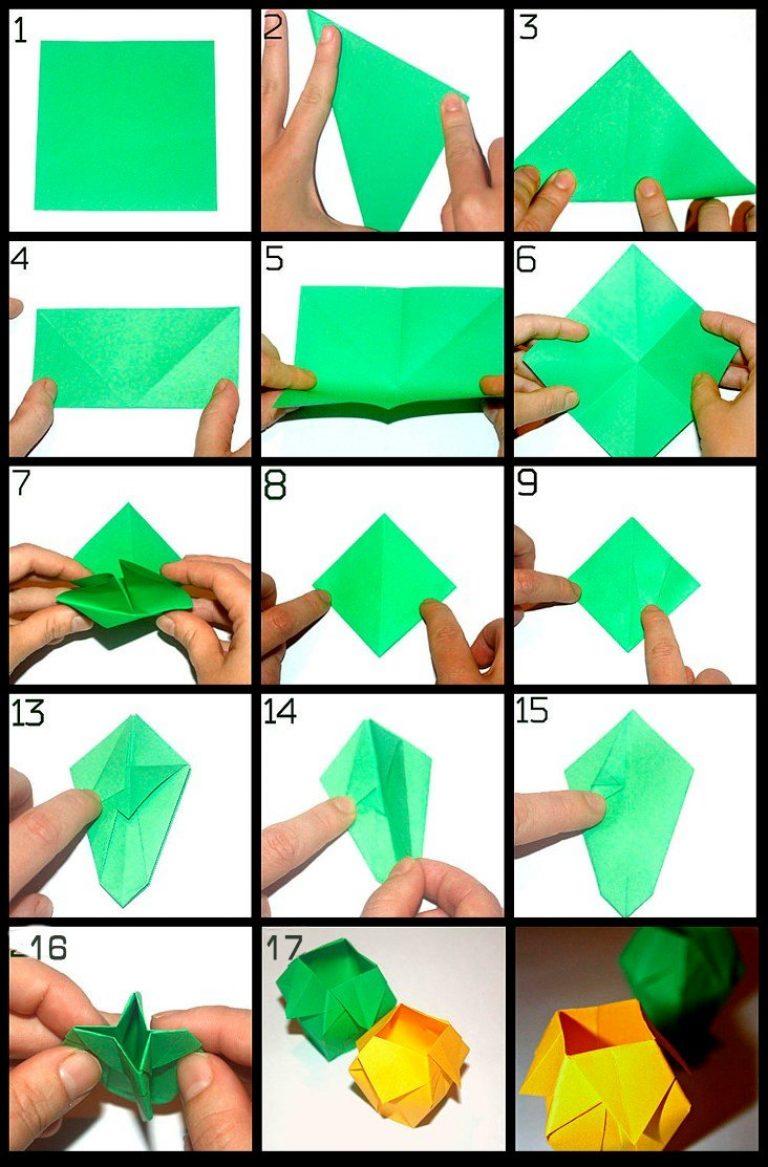
So, let's get to work. We take a square of colored paper and bend it diagonally, after which we unfold it and do the same with the opposite diagonal (see Figures 1-3). Then it is necessary to fold the sheet in the form of a rhombus and iron the lines along which we will then bend the part (see Fig. 4-6).
Now we bend the left and right corners, turn the part over and repeat the steps with the remaining corners. After that, we unbend the central corner, lowering it to the middle, and bend the left corner. Then you need to turn the workpiece and repeat the manipulations: bend the corners to the center and along the marked lines. The lowest corner is unfolded and unbent: this is necessary for the stability of the vase.
In more detail, the procedure can be considered on the provided step-by-step diagram with images. Connoisseurs say that it is unlikely that you will be able to make a beautiful vase using origami the first time, because the work is painstaking and requires some skills, so it is better to try on unnecessary pieces of paper.
If desired, the vase is decorated by applying touches of glue to the surface and filling them with colored semolina, sparkles, rhinestones or beads.
In the next assembly of pictures, you can consider how to make a vase from modules - parts from which a decorative product is then assembled. To make the vase bright, use modules of different colors.
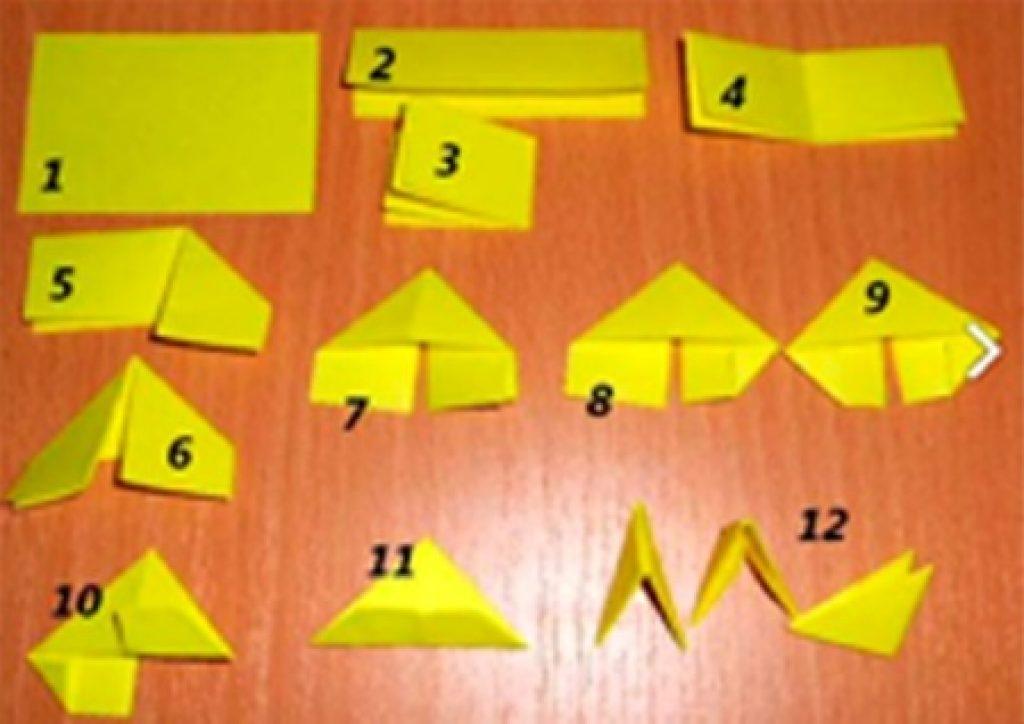
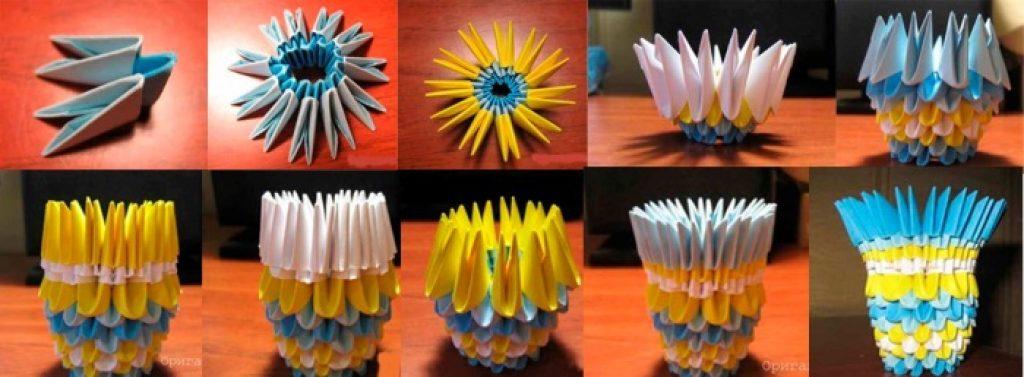
This work is considered more complex and requires experience and thoughtfulness: one wrong step and everything will go down the drain.
Vase from origami modules: video
Modules are made of 1/32 rectangles
Video: how to make origami modules 1/32. Master class for beginners.
Now we will tell you how to make such an unusual and stylish vase for storing small items. Please note that the product is not intended for food!
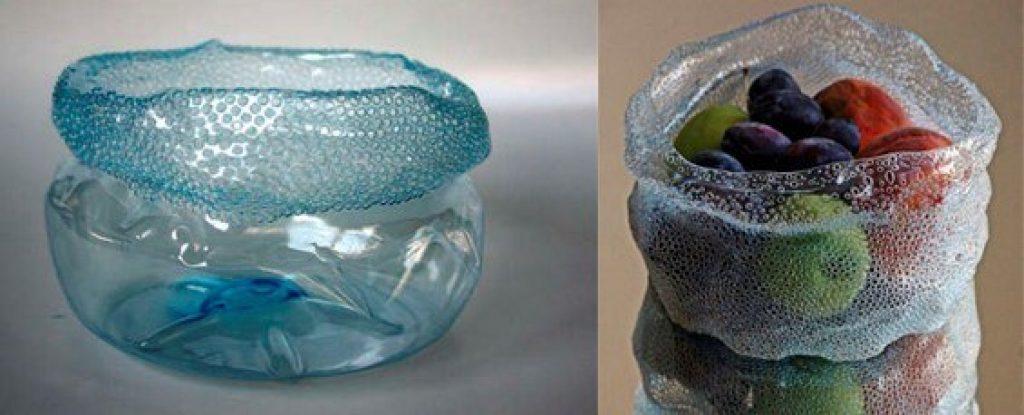
We take a plastic bottle of any color, hold it over the fire to bend it: this must be done while the plastic is hot. After cooling, we take a soldering iron and drill a large number of holes of the same diameter in a chaotic manner. Everything, our vase is ready!
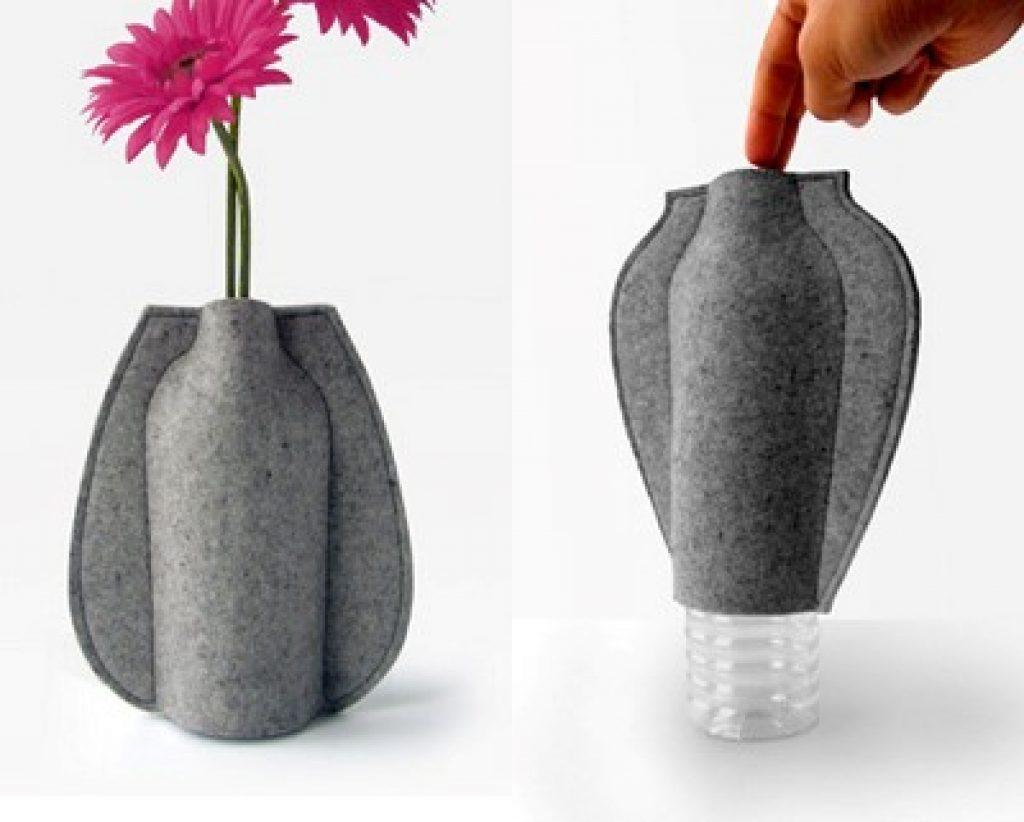
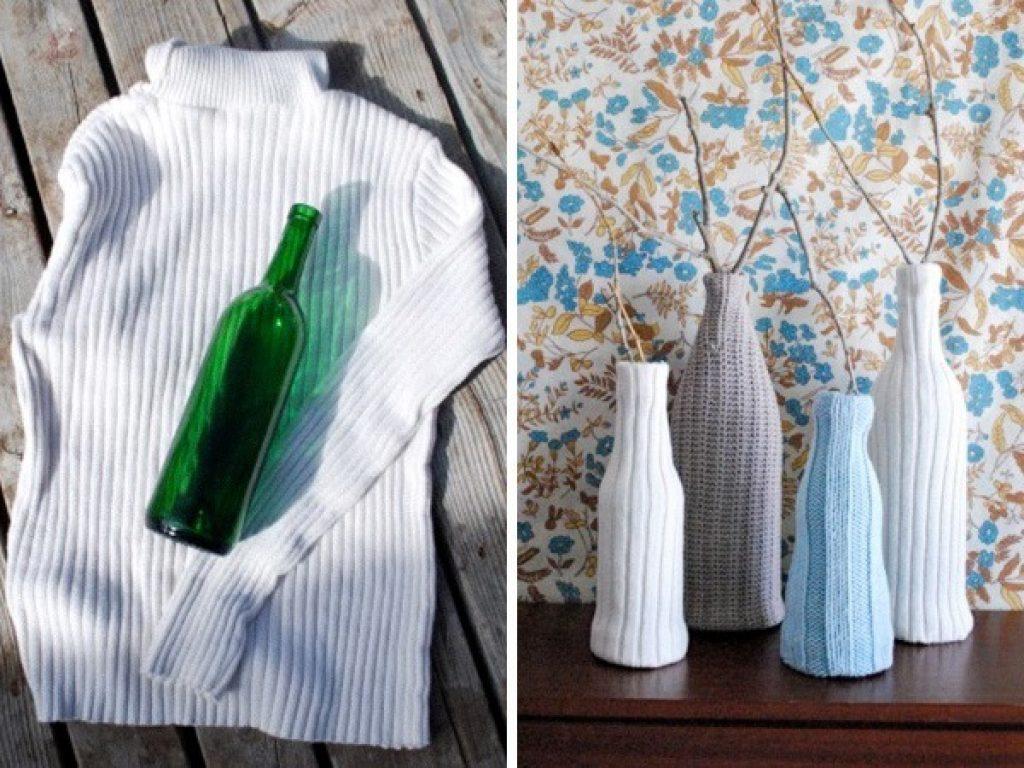
You can take an ordinary plastic bottle and sew a case out of felt or an old sweater on it. This decor is great for decorating a country interior.
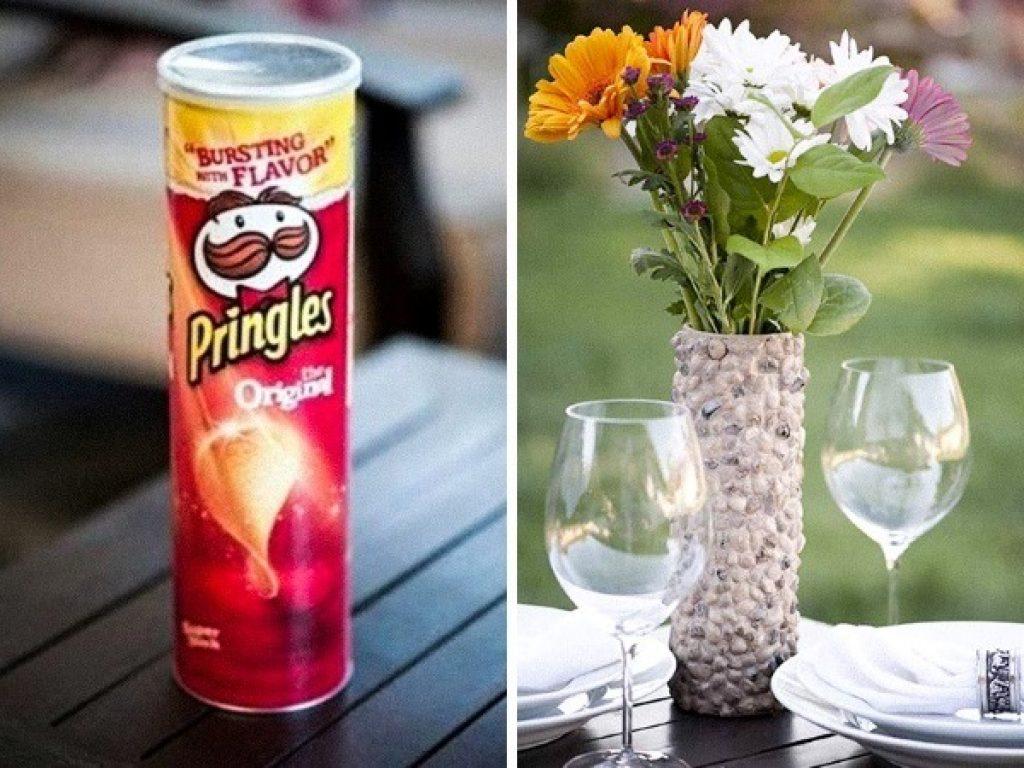
A plastic bottle or a box of chips can also be transformed beyond recognition by pasting over the surface with stones or shells.
The most elementary way to decorate a plastic bottle is to wrap it with printed tissue paper or colored tape, and then decorate it with a matching bow.
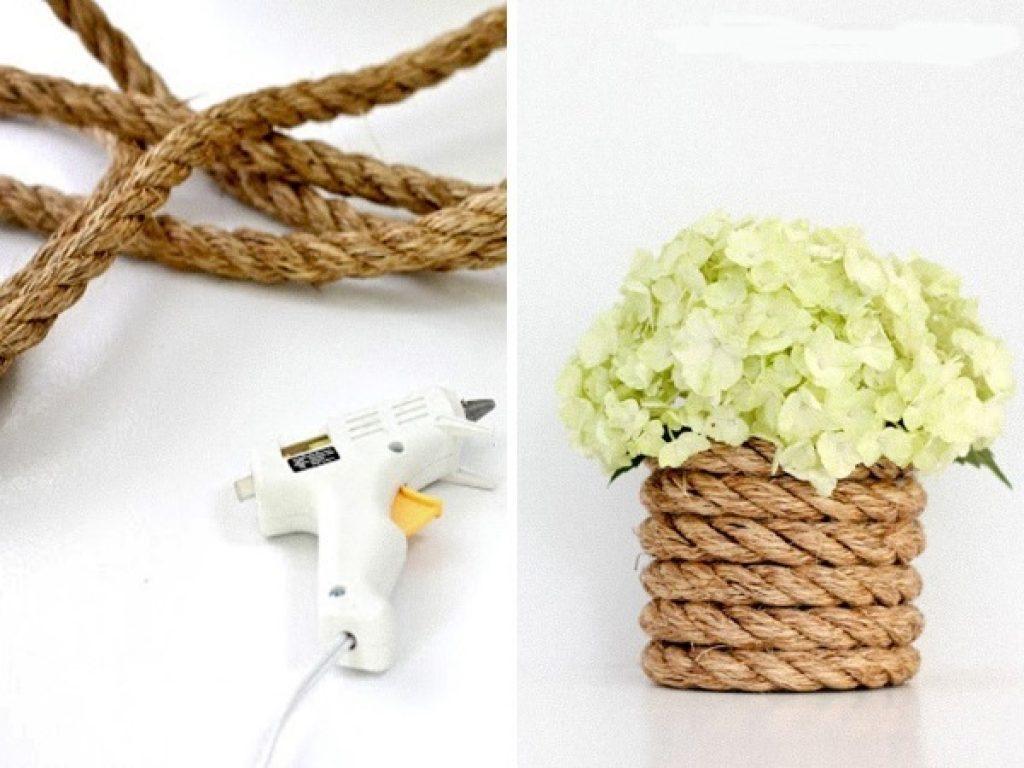
You can also wrap the bottle with colored threads or rope.
DIY plastic bottle vase: video
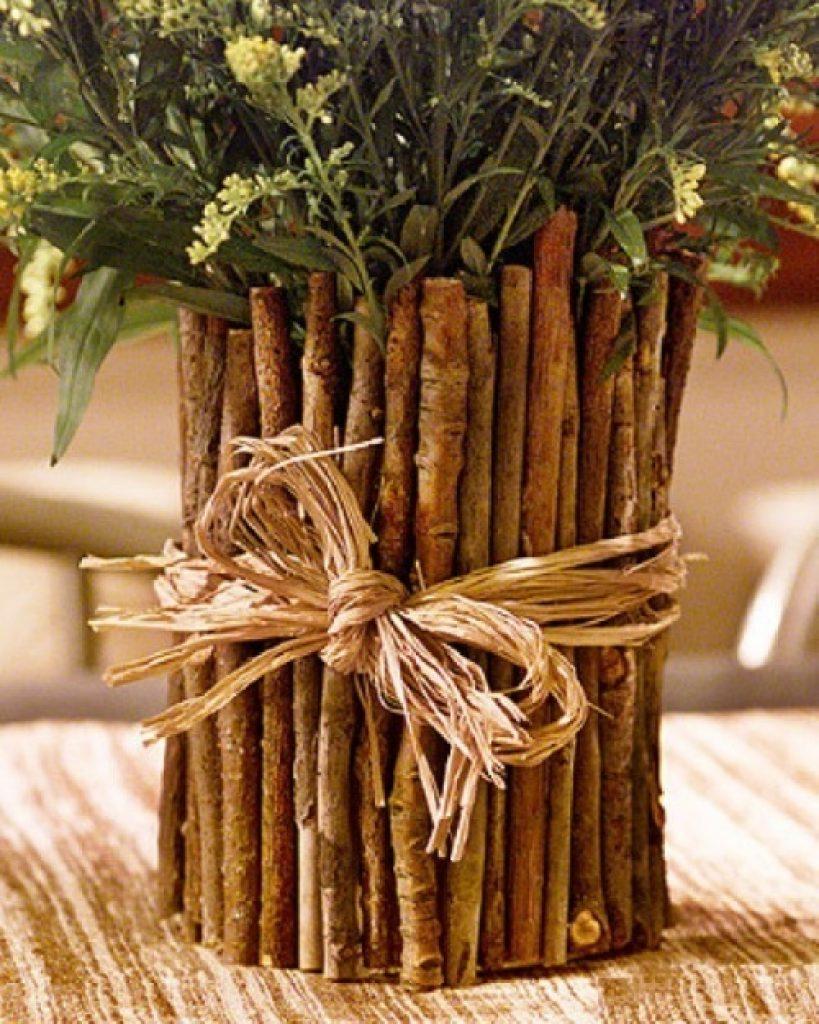
Vases made from natural materials
In the modern world, there is so little ecological cleanliness that you want to be closer to nature, even in urban environments. Eco-design is very relevant today, so if you choose a vase for giving, feel free to follow our advice.
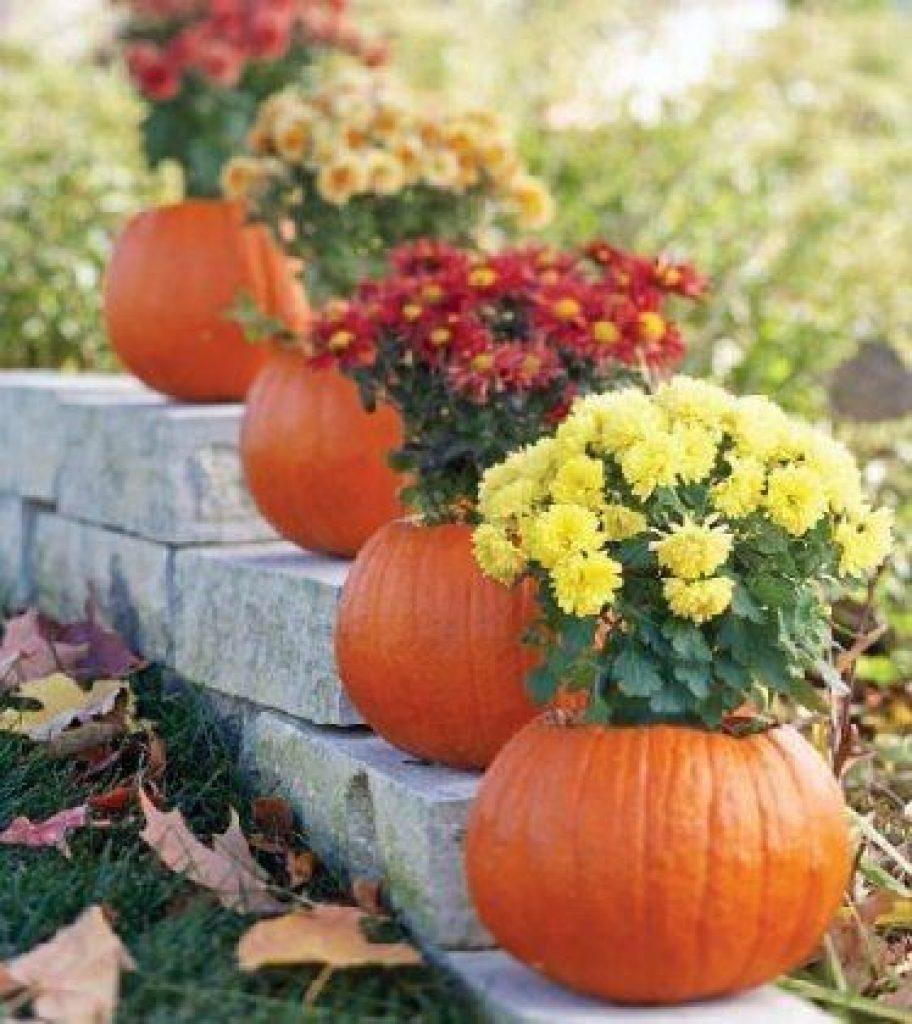
Pumpkin crafts are a great way to show your imagination and rally the family for a common needlework. To work, you need to stock up on a sharp knife, a spoon and pumpkins of different sizes.
Take a pumpkin and cut off the top from it, and through the hole, clean it from the insides and let it dry. The pulp can not be thrown away, but used to make face masks. Let's start with the manufacture of the simplest options for environmentally friendly vases.
The edges of the vase can be made "lace" by carefully cutting them with a thin knife.
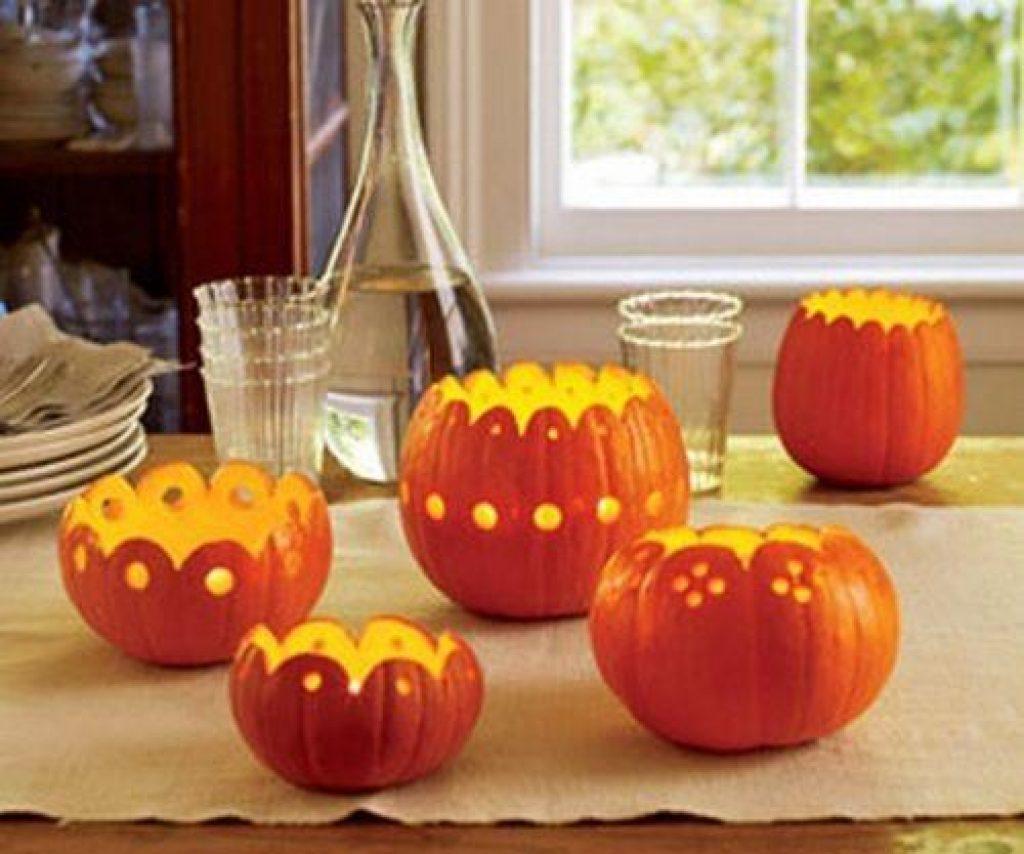
If you are familiar with, use your skills to make a unique pumpkin vase that you can put burning candles inside!
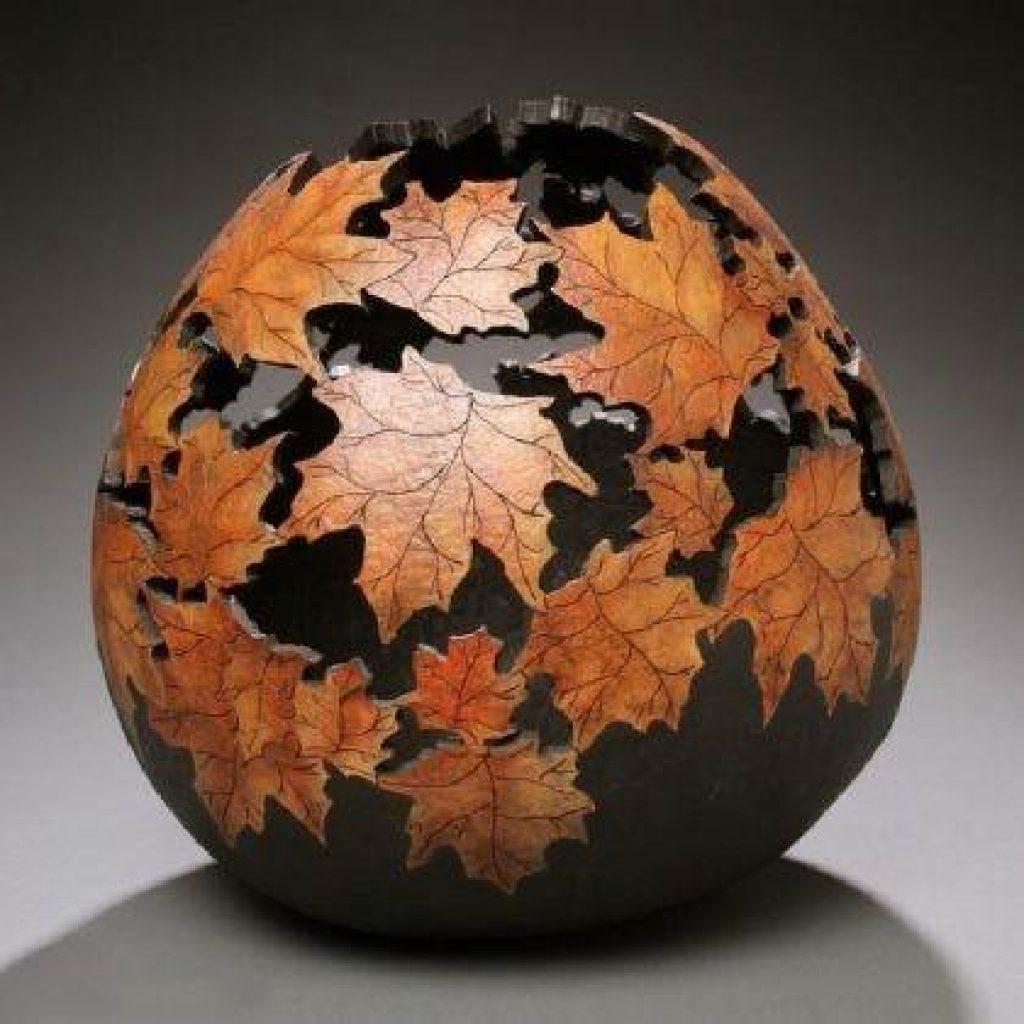
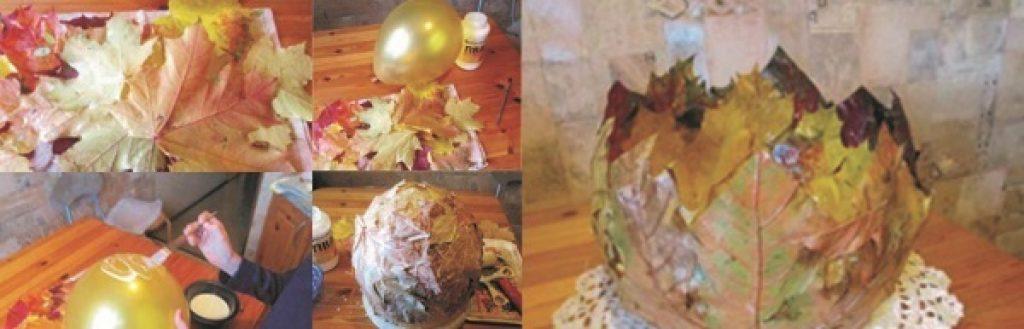
How to make a vase from maple leaves with your own hands
And kids will surely like such a vase, because it’s fun to make it, and it’s also interesting to use it! Collect a bunch of maple leaves, clean them of dirt and cut off their legs. In the meantime, it is necessary to inflate the balloon and smear it with glue to the middle. We glue the leaves overlapping each other using PVA glue and a brush. Let the product dry. When the leaves dry, pierce the ball and carefully remove it.
(4
ratings, average: 4,75
out of 5)